The Ultimate Canine First Aid Blueprint: How to Save Your Dog’s Life in a Medical Emergency
2 months ago
Every single day, thousands of devoted dog owners face sudden, heart-stopping medical emergencies. Whether it is a routine afternoon walk that ends in a violent dog fight, an unexpected raid on the kitchen pantry containing toxic baking chocolate, or the terrifying onset of heat stroke on a humid summer afternoon, the baseline reality remains absolute: in a veterinary emergency, minutes measure the thin margin between complete recovery and tragic mortality.
While the gold standard of care will always be the immediate intervention of a licensed DVM (Doctor of Veterinary Medicine), the physical reality of structural distance, traffic congestion, and clinical intake backlogs means that you—the pet parent—are your dog’s very first responder. The actions you take within the initial sixty seconds of a traumatic event or acute toxic exposure set the entire trajectory for what the veterinary triage team can accomplish once you arrive at the clinic.
This comprehensive, highly detailed medical manual is engineered to strip away the panic of the unknown and equip you with the deep clinical knowledge, physical techniques, and structural step-by-step protocols required to stabilize your canine companion across every major emergency scenario.
The Biomechanics of Canine Trauma – Stopping Hemorrhage and Managing Fractures
Physical trauma from vehicular impacts, high-velocity falls, or animal attacks demands precise, mechanical intervention. When a dog is structurally compromised, your primary goals are the prevention of hypovolemic shock (fatal systemic drop in blood pressure due to volume loss), structural stabilization of the skeletal framework, and immediate stabilization of delicate ocular tissues.
                  CRITICAL TRAUMA STABILIZATION MATRIX

  [ HEMORRHAGE ]  ──► Direct Compression ──► Layered Bandaging ──► Avoid Tourniquets
  [ FRACTURES ]   ──► Total Immobilization ──► Soft Splinting ──► Avoid Bone Reduction
  [ PROLAPSUS ]   ──► Continuous NaCl 0.9% ──► Sterile Gauze Shield ──► Do Not Push Eye
1. Advanced Hemorrhage Control and Open Wound Decontamination
An open, actively bleeding laceration can rapidly transition from a superficial scare to a life-threatening hemorrhage if a major artery or vein is severed.
Step 1: Secure Your Safety and Restrain the Patient
Pain completely alters a dog’s psychology. Even the most gentle, deeply bonded family dog can instinctively bite when suffering from severe physical trauma.
-
Approach the dog slowly, speaking in low, even tones.
-
If the dog is not vomiting or experiencing respiratory distress, apply a temporary cloth muzzle or gauze wrap around the muzzle to secure the jaws. This protects you and allows you to apply force to the wound without fear of defensive bites.
Step 2: Clear and Decontaminate the Margins
To prevent aggressive bacterial inoculation and deep-tissue sepsis, clear the path to the injury.
-
Use blunt-tipped bandage scissors to carefully clip away matting fur at least two inches around the margins of the wound. Fur acts as a structural wick for environmental pathogens; removing it keeps the laceration clean.
-
If visible debris like thorns, shards of glass, or gravel are embedded superficially in the tissue, gently extract them using sterile tweezers. Crucial clinical exception: If a large object (such as a thick stick or a metal shard) has deeply penetrated the chest, abdomen, or throat, do not pull it out. Deeply embedded objects act as internal structural plugs that seal off lacerated arteries. Removing them at home can spark a massive, uncontrollable internal hemorrhage. Stabilize the object in place with rolled towels and seek immediate surgical intervention.
-
Flush the open wound thoroughly using sterile saline solution (NaCl 0.9%). If saline is unavailable, use clean, lukewarm water mixed with a mild chlorhexidine solution or highly diluted hydrogen peroxide ($H_2O_2$) specifically for the initial flush to oxidize anaerobic bacteria. Do not scrub the raw tissue, as this destroys delicate clotting factors and newly formed cellular matrices.
Step 3: Achieve Hemostasis Through Layered Compression
To halt active bleeding, apply a sterile gauze pad or a clean, lint-free cloth directly over the wound.
-
Apply firm, continuous, direct physical pressure with the heel of your hand for a minimum of 5 to 10 full minutes without lifting the cloth to check the progress. Lifting the pad tears away the fragile micro-clots trying to seal the ruptured vessels.
-
If blood saturates completely through the first layer of gauze, do not remove it. Removing the soaked gauze pulls off the primary clot. Instead, place a second, thicker layer of gauze directly over the saturated pad and continue applying firm pressure.
-
Secure the compressed dressings tightly with a cohesive flexible bandage (such as Vetrap or a clean strip of cloth). Ensure the bandage is snug enough to maintain hemostasis but loose enough that you can slip two fingers beneath it, preventing the total cutoff of distal arterial circulation. Avoid the routine use of tight limb tourniquets unless a lower limb or tail has been completely severed; amateur tourniquet application routinely cuts off arterial supply while failing to stop deep venous return, causing massive tissue necrosis.
2. Skeletal Immobilization: Managing Fractures and Preventing Secondary Internal Trauma
A fractured bone is not merely a structural break; it is a razor-sharp internal hazard. When an injured dog moves a broken limb, the sharp, fractured edges of the bone slice through surrounding muscle bellies, sever delicate peripheral nerves, and can rupture deep arterial lines like the femoral artery.
Clinical Recognition of Fractures
-
Complete non-weight-bearing lameness (the limb is held completely off the ground).
-
Structural asymmetry, abnormal angulation, or visible limb shortening.
-
Subcutaneous crepitus (a distinct crackling or grinding sensation felt under the skin when the area is lightly touched).
-
Soft tissue swelling accompanied by localized, extreme heat.
Stabilization and Splinting Protocols
-
Enforce Absolute Movement Restrictions: Do not allow the dog to walk or drag the injured limb. If the dog attempts to stand, gently but firmly pin them in a lateral recumbent position (lying flat on their side) to keep the broken limb resting on a stable surface.
-
The Rule of Bone Reduction: Under no circumstances should you attempt to force a protruding or misaligned bone back into its natural socket or pull it beneath the skin line. This introduces massive environmental contamination deep into the marrow, triggering severe osteomyelitis (bone infection) that often necessitates amputation.
-
Constructing a Temporary Soft Splint: If the fracture is located below the elbow or below the hock (knee), and the dog is calm enough to tolerate stabilization without fighting, you can construct a functional emergency splint. Wrap the entire limb in a thick, uniform layer of cotton roll or soft towels. Place a rigid structural support—such as a tightly rolled magazine, a thick stack of newspapers, or a straight piece of heavy cardboard—along the side of the padded limb. Secure the rigid support firmly using medical tape or cloth strips. The splint must extend past the joint directly above and the joint directly below the break to completely lock the fracture site in place.
-
Safe Emergent Transport: To transfer a fractured or polytraumatized dog into a vehicle without worsening internal spinal or skeletal injuries, construct a temporary flat stretcher. Slide a rigid board, a heavy plastic storage bin lid, or a thick, tightly pulled blanket beneath the dog’s body while maintaining a completely neutral spine. Lift the stretcher evenly with the help of another person, ensuring the dog's body weight remains perfectly distributed across the flat surface during transport.
3. Epistaksis (Severe Nosebleeds)
Severe bleeding from the nasal cavity can be highly disorienting for a canine patient, causing them to sneeze violently, which further escalates blood pressure and worsens the hemorrhage.
-
Nasal Fluid Dynamics: Keep the dog's head tilted slightly forward or parallel to the ground. Never tilt a dog's head backward to stop a nosebleed; this forces heavy streams of blood down the nasopharynx into the trachea and lungs, causing aspiration pneumonia, or down into the stomach, which induces severe, bloody vomiting.
-
Thermal Vasoconstriction: Wrap a handful of crushed ice or a commercial cold pack in a thin towel and apply it directly over the bridge of the dog's nose. The intense cold penetrates the thin subcutaneous tissues, causing rapid vasoconstriction of the sensitive nasal mucosal arteries, which systematically slows and halts the internal bleeding. Keep the dog completely quiet and dimly lit to prevent blood pressure spikes.
4. Prolapsus Bulbi (Ocular Proptosis): Preserving the Ocular Globe
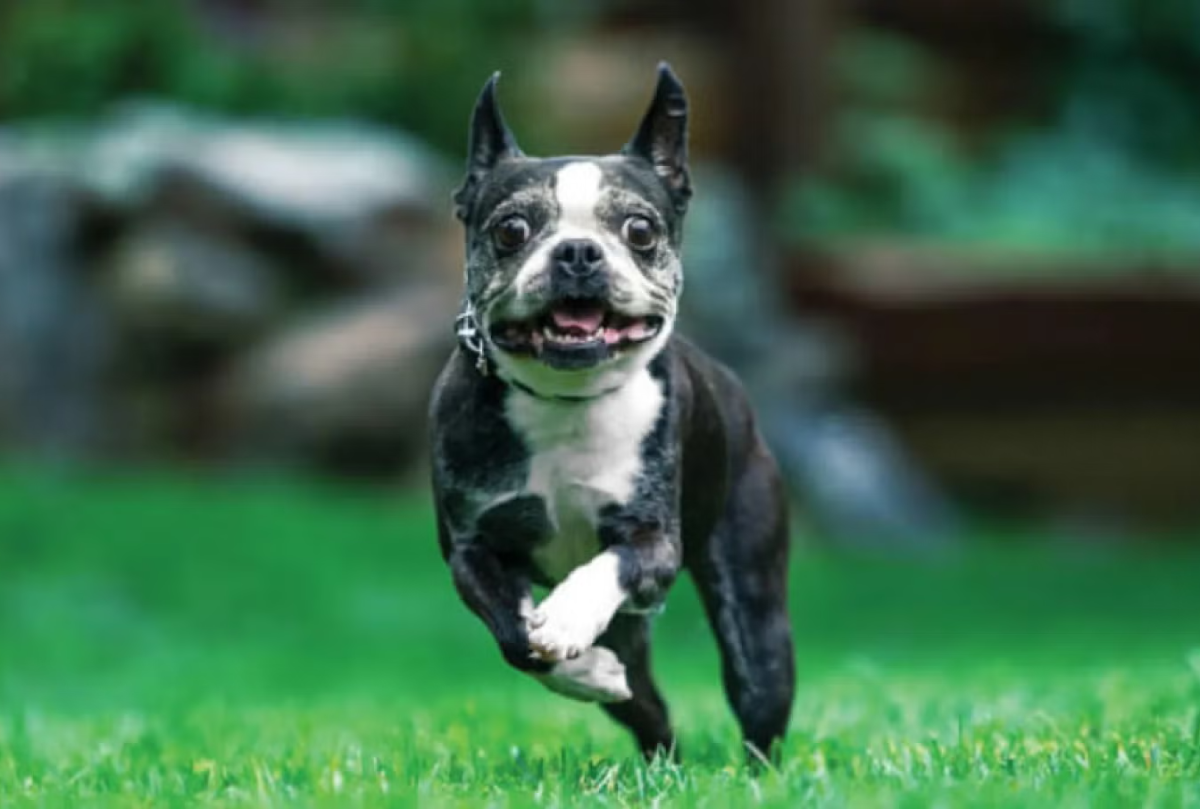
Ocular proptosis—a critical emergency where the eyeball is physically displaced forward out of the bony orbital socket, causing the eyelids to trap behind the globe—is a severe condition seen most frequently in brachycephalic breeds (such as Pugs, Shih Tzus, French Bulldogs, and Boston Terriers) due to their shallow orbital anatomy and wide eyelid apertures.
                  PROPTOSIS EXTREME EMERGENCY PROTOCOL

  [ STEP 1 ] ──► NEVER try to push the eyeball back into the socket.
  [ STEP 2 ] ──► Drench the exposed eye instantly with sterile NaCl 0.9% or clean water.
  [ STEP 3 ] ──► Saturate a sterile gauze pad or lint-free cloth in saline.
  [ STEP 4 ] ──► Place the wet gauze gently over the globe; re-wet EVERY 10 MINUTES.
The primary clinical danger of proptosis is the rapid drying of the cornea, accompanied by intense tension on the optic nerve and central retinal artery. If the cornea dries out completely or the nerve is stretched too far, the dog will suffer irreversible blindness and tissue death within hours.
-
The Rule of Manual Manipulation: Never attempt to manually push the eyeball back into the socket at home. Doing so applies immense pressure to the globe, which can rupture the internal chambers of the eye or snap the delicate extraocular muscles and nerves completely.
-
Aggressive Hydro-Hydration: Immediately drench the exposed eyeball with sterile saline solution (NaCl 0.9%) or clean, lukewarm tap water if saline is unavailable. The eye must never be allowed to dry for even a single minute.
-
The Continuous Wet Shield: Saturate a sterile gauze pad or a clean, soft cloth in saline and gently drape it over the protruding eye. To prevent the cloth from drying out due to body heat and air exposure during transit, re-wet the dressing with saline every 10 minutes without fail. This maintains corneal moisture and keeps the tissue viable until a veterinary surgeon can perform an emergency lateral canthotomy to safely replace the globe under general anesthesia.
Emergency Toxicology – Decontamination, Antidotes, and the Science of Adsorption
Dogs are notorious indiscriminate eaters. Their highly developed olfactory systems draw them to toxic household items, specialized human medications, and industrial chemical agents. When an ingestion event occurs, managing the situation requires an understanding of how toxins move through the digestive tract.
Home Chemical Neutralization Guide
1. The Critical Decision: To Induce or Not to Induce Vomiting?
When you discover your dog has consumed a toxic substance, your immediate instinct is often to force the animal to vomit. However, performing gastric evacuation without first identifying the specific chemical properties of the toxin can be fatal.
When to Induce Vomiting (Emesis)
You should only induce vomiting if the toxin was ingested within the last 1 to 2 hours, the dog is completely conscious, alert, and standing, and the substance is classified as non-corrosive.
Examples of substances where emesis is safe and recommended include:
-
Human medications (Acetaminophen, Ibuprofen, antidepressants).
-
Large quantities of dark chocolate, cocoa powder, or items containing xylitol.
-
Rodenticide pellets (anti-coagulant baits or cholecalciferol) ingested recently.
-
Grapes, raisins, or heavy amounts of onions/garlic.
How to Safely Induce Vomiting at Home
-
The Hydrogen Peroxide Method: Administer fresh, unexpired $3\%$ Hydrogen Peroxide ($H_2O_2$) orally. The standard clinical dose is 1 milliliter per pound of body weight (or roughly 1 teaspoon per 5 pounds), with a maximum ceiling dose of 45 milliliters for large dogs. Hydrogen peroxide works by generating rapid oxygen bubbles that physically distend the stomach lining, stimulating the local glossopharyngeal and vagal nerve pathways to trigger the emetic center in the brain within 10 to 15 minutes.
-
The Table Salt Method (Alternative): If hydrogen peroxide is unavailable, mix 1 to 2 teaspoons of standard table salt into a small cup of warm water and force-feed it using a plastic syringe or turkey baster. The intense hypertonic salinity shifts fluid rapidly into the gastric lumen, causing fast expansion and triggering an immediate vomiting reflex. Use this method cautiously, as failing to produce vomiting can lead to high sodium absorption, risking hypernatremia (salt poisoning).
When Vomiting is Strictly Forbidden
Never attempt to induce vomiting if the dog is lethargic, comatose, having seizures, or losing consciousness. When a dog's neurological reflexes are depressed, they lose the ability to close the glottis during vomiting. This causes the vomit to stream directly down into the trachea and lungs, resulting in immediate asphyxiation or fatal aspiration pneumonia.
Furthermore, never induce vomiting if the dog has swallowed corrosive chemicals, petroleum distillates, or sharp objects:
-
Corrosive Acids/Alkalis: These burn the delicate tissues of the esophagus on the way down. Forcing them back up causes a second round of severe chemical burns, often leading to esophageal perforation, mediastinitis, and death.
-
Petroleum Distallates (Gasoline, Kerosene, Motor Oil): These volatile liquids vaporize easily. As they are vomited back up, the dog will inevitably inhale the toxic fumes directly into the lungs, destroying alveolar tissue and causing acute respiratory failure.
-
Sharp Objects (Bones, Needles, Glass): Forcing these objects back up through the esophagus can slice open major thoracic organs or lock them horizontally across the throat, causing acute airway obstruction.
2. The Science of Adsorption: Administering Activated Charcoal
Once a toxin passes from the stomach into the small intestine, induction of vomiting is no longer effective. Your primary defense then shifts to stopping the chemical from crossing the intestinal wall into the bloodstream. This is achieved through the process of adsorption using activated charcoal.
               ADSORPTION VS ABSORPTION IN THE CANINE GUT

  [ ABSORPTION ] ──► Toxin moves freely across intestinal wall ──► Liver/Kidney Damage

  [ ADSORPTION ] ──► Activated Charcoal (Porous Carbon)
                             │
                             ▼
                     Attracts & binds toxin molecules via electrical charge
                             │
                             ▼
                     Large Charcoal-Toxin Complex ──► Safely excreted via feces
Activated charcoal is an intensely porous, highly processed carbon material with an immense surface area. It carries a native negative electrical charge that naturally attracts and binds to the positive charges of many toxic organic molecules.
-
The Adsorption Bond: When activated charcoal mixes with dissolved toxins in the digestive tract, it locks the toxic molecules tightly within its complex network of microscopic pores. This forms a large, inert compound that cannot pass through the intestinal wall, allowing the toxin to travel safely through the intestines and be excreted in the stool.
-
Emergency Protocol: Administer a minimum of 6 tablets of activated charcoal (such as standard Norit tablets), crushed thoroughly and dissolved completely in warm water, or use 1 to 2 tubes of veterinary-grade activated charcoal paste. Force the mixture into the side of the dog's mouth using a plastic feeding syringe.
-
Clinical Limitations: Activated charcoal is highly effective against organic poisons, but it does not bind to small ions or alcohols. It is completely ineffective against heavy metals (lead, mercury, arsenic), ethanol, methanol, ethylene glycol (antifreeze), and highly caustic acids or alkalis.
Severe Gastrointestinal Crises – Managing Acute Vomiting and Explosive Diarrhea
Acute gastrointestinal crises—characterized by sudden, severe vomiting or persistent, explosive diarrhea—are among the most common reasons dogs are rushed to emergency clinics. While occasional digestive upset can be benign, sudden and repetitive gastrointestinal distress can quickly lead to severe dehydration, metabolic acidosis, hypokalemia (dangerously low potassium levels), and hypovolemic shock.
1. The Pathophysiology of Vomiting: Why Absolute Gastrointestinal Rest is Vital
Vomiting is a complex, energy-consuming reflex coordinated directly by the Chemoreceptor Trigger Zone (CRTZ) in the brainstem. When a dog's stomach lining becomes acutely inflamed due to dietary indiscretion, viral infection (such as Parvovirus), or foreign body irritation, the gastric mucosa experiences intense cellular stress.
-
The Cycle of Continuous Irritation: Every time a dog vomits, the smooth muscles of the stomach contract violently, and highly acidic gastric juices ($HCl$) stream up through the esophagus. If you immediately offer water or food to a dog that has just vomited, the mechanical distension of the already inflamed stomach wall triggers an immediate, hyper-reactive vagal nerve reflex. This leads to another round of vomiting, causing further loss of vital fluids and electrolytes.
-
The 4-to-6-Hour Strict NPO Protocol: To break this cycle, enforce an absolute NPO (Nil Per Os / Nothing by Mouth) status for a minimum of 4 to 6 full hours. This means removing all food bowls and water dishes completely out of the dog's reach. The stomach requires absolute physical rest to allow local prostaglandin levels to stabilize and the protective mucus barrier of the gastric wall to repair itself.
-
The Ice Cube Hydration Method: If the dog shows intense thirst during this fasting window, do not let them drink from a water bowl. Gulping large amounts of water will distend the stomach and trigger immediate vomiting. Instead, offer 1 or 2 clean ice cubes for the dog to lick slowly. Licking ice provides a tiny, controlled stream of moisture that hydrates the oral membranes without expanding the stomach wall, keeping the dog comfortable while the stomach recovers.
2. Managing Explosive Diarrhea: Protecting the Intestinal Mucosa
Explosive or repetitive diarrhea indicates that the small or large intestine is experiencing hypermotility (abnormal speeding up of intestinal contractions) and malabsorption, preventing the proper reclamation of water and vital electrolytes.
-
Enforcing a Short Fast: Just like with vomiting, fast the dog from all solid food for 4 to 6 hours to halt the transit of hard-to-digest materials through the inflamed intestinal tract. Unlike with active vomiting, you can leave small amounts of clean water available to help replace ongoing fluid losses.
-
First-Aid Anti-Diarrheal Intervention: Administer an over-the-counter veterinary kaolin-pectin or attapulgite suspension if available. These compounds act as natural intestinal protectants; they coat the inflamed mucosal lining of the gut and bind to bacterial enterotoxins, safely escorting them out through the stool.
-
The Bland Diet Transition Strategy: Once the fasting period ends and the diarrhea begins to subside, do not return the dog to their standard commercial kibble or high-fat canned food. The damaged intestinal villi cannot process complex fats or heavy proteins.
                  THE CLINICAL BLAND DIET SPECIFICATION

  [ CARBOHYDRATE COMPONENT ] ──► 70% Overcooked White Jasmine/Basmati Rice (Easy Starch)
  [ PROTEIN COMPONENT ]      ──► 30% Boiled Skinless White Chicken Breast (Lean Protein)
  [ EXCLUSION CRITERIA ]     ──► 0% Butter, 0% Salt, 0% Oil, 0% Commercial Treats
Feed this bland diet in small, frequent meals (3 to 4 times a day) for 48 to 72 hours. Once the stool returns to a solid, well-formed consistency, gradually mix their regular kibble back into the bland diet over a 4-day period to prevent a relapse of intestinal inflammation.
-
The Elimination of Inflammatory Triggers: Completely eliminate all dairy products, commercial treats, table scraps, and high-fat foods. Dogs lack significant amounts of the lactase enzyme, so giving them milk or cheese during a digestive crisis will worsen the diarrhea through osmotic fluid shifts in the bowel.
Dysregulation of the Thermal Axis – Heat Stroke and Systemic Hypothermia
Dogs possess a limited homeostatic capacity for thermal regulation compared to humans. Because they lack sweat glands across their skin and rely primarily on panting (evaporative cooling from the respiratory tract) and mild heat dissipation from their footpads, they are highly vulnerable to extreme environmental temperatures.
Thermal Axis Emergency Specifications
1. Heat Stroke (Severe Hyperthermia): Halting Systemic Thermal Destruction
Heat stroke is a devastating medical emergency that triggers widespread cellular damage. When a dog's internal core temperature climbs past $41^\circ\text{C}$ ($105.8^\circ\text{F}$), the structural proteins within their cells begin to denature, leading to widespread vascular endothelial damage, disseminated intravascular coagulation (DIC), severe brain edema, and rapid multi-organ failure.
                  THE HYPERTHERMIC SYSTEMIC CASCADE

  Core Temp > 41°C ──► Protein Denaturation ──► Endothelial Lining Destruction
                                                          │
                                                          ▼
  Multi-Organ Shutdown ◄── Disseminated Intravascular Coagulation (DIC)
How to Safely Cool an Overheated Dog
-
Immediate Environmental Relocation: Instantly move the dog out from direct sunlight or the enclosed space into a heavily air-conditioned room or a deeply shaded area with active airflow.
-
The Tepid Water Evaporative Protocol: Drench the dog's entire body with cool or tepid tap water. Never use ice water or submerge an overheated dog in an ice bath. This is a critical medical error. Introducing extreme cold to a hyperthermic animal causes immediate vasoconstriction of the peripheral blood vessels in the skin. This locks the intense heat inside the dog's core organs, preventing it from escaping, and can trigger a dangerous spike in internal temperature along with severe cardiovascular shock.
-
The Microvascular Alcohol Technique: Pour 70% isopropyl alcohol onto the hairless areas of the dog's body, specifically their paw pads, groin, and axillary regions. Alcohol evaporates much faster than water, acting as an effective heat pump that draws thermal energy out of the superficial blood vessels quickly.
-
Continuous Air Flow Monitoring: Place a powerful electric fan so it blows directly onto the wet dog to maximize evaporative cooling. Use a digital rectal thermometer to check their temperature every 5 minutes. As soon as the dog's internal core temperature drops down to $39.5^\circ\text{C}$ ($103.1^\circ\text{F}$), stop all active cooling measures completely. Dry the dog off with a towel. If you continue cooling past this point, the dog's internal thermostat can overshoot, sending them into severe hypothermia and shock.
2. Systemic Hypothermia: Safely Restoring Core Body Warmth
Systemic hypothermia occurs when a dog experiences prolonged exposure to freezing weather, falls into cold water, or remains wet in windy conditions. This suppresses the central nervous system, slows cardiac output, and leads to severe metabolic depression.
How to Warm a Hypothermic Dog
-
Isolate and Insulate: Move the dog into a warm, draft-free room. Dry them completely using highly absorbent microfiber towels. Wrap their body in multiple layers of pre-warmed blankets fresh from a clothes dryer.
-
The Padded Hot Water Bottle Strategy: Fill several plastic bottles with hot water. Wrap each bottle securely in a thick towel or cloth. Never place a bare hot water bottle or an uninsulated heating pad directly against a hypothermic dog's skin. Hypothermic animals have poor peripheral circulation, meaning their cold skin cannot dissipate heat normally. Placing a direct heat source against them can cause severe thermal burns without the dog even realizing it. Position the insulated bottles gently against the dog's core areas—their chest, abdomen, and groin—where major blood vessels run close to the surface.
-
Environmental Radiant Warming: Set up a warm incandescent desk lamp or a safe space heater focused toward the dog's recovery area to naturally warm the air they are breathing. Keep the dog confined to a small crate or bed to encourage them to rest quietly, conserving their metabolic energy as their core body temperature safely climbs back into the normal range ($38^\circ\text{C} - 39.2^\circ\text{C}$).
Obstetrics and Neonatal Emergencies – Managing Whelping and Dystocia
For owners of breeding or pregnant female dogs (dams), the process of whelping (giving birth) can quickly shift from a natural life event into a stressful reproductive emergency. Understanding how to recognize normal whelping behavior versus true dystocia (pathological difficulty in delivering puppies) is essential for preserving the lives of both the mother and her newborn litter.
                     THE WHELPING CRITERIA TIMELINE

  [ NORMAL STAGE 1 ]  ──► Temp drops < 37°C ──► Nesting, panting, mild distress (6-12hr).

  [ REPRODUCTIVE EMERGENCY ] ──► Strong contractions for >30min with NO puppy born.
                             ──► >2 hours pass between consecutive puppies.
                             ──► Black, foul green, or purulent discharge exits vagina.
1. Managing a Breech or Posterior Malpresentation
A significant percentage of canine fetuses are delivered in a posterior position (hind legs coming out first). While this is a normal variation in dogs, a true breech presentation occurs when the puppy's hind legs become jammed or extended forward, causing the wider pelvic structure to get stuck within the dam's narrow pelvic canal.
-
Identifying a Stuck Puppy: If you look at the dam's vulva and see two small hind paws protruding but the rest of the puppy's body remains trapped inside despite active straining, you must provide immediate assistance.
-
The Synchronized Rotational Traction Technique: Thoroughly wash your hands and lubricate your fingers with a water-soluble medical jelly (such as K-Y Jelly). Grasp the protruding hocks or thighs of the puppy using a clean, sterile gauze pad to ensure a secure, slip-free grip.
                  THE REPRODUCTIVE TRACTION ANGLE

  [ Dam's Spine ]  ============================================
                                                      \
                                                       \  [ Direction of Pull ]
                                                        ▼ (Downward, J-Shaped Arc)
Never pull straight outward or upward against the dam's anatomy, and never pull by the tail or a single foot, as this can dislocate joints or cause severe internal tearing. Wait until the dam experiences her very next active uterine contraction. As she strains, gently pull the puppy downward in a smooth, continuous, J-shaped arc toward the dam's hocks. Maintain steady, gentle pressure without jerking, allowing the puppy's hips to slide safely through the pelvic ring until the delivery is successful.
2. Identifying True Dystocia: When Immediate Surgery is Required
You must contact an emergency veterinary hospital or prepare for an emergency Cesarean section if the dam displays any of the following clinical indicators of dystocia:
-
Active Contraction Failure: The dam experiences strong, visible abdominal contractions for more than 30 to 45 minutes without producing a puppy. This indicates that a puppy is structurally blocked or abnormally large for the birth canal.
-
Uterine Inertia Exhaustion: A period of more than 2 full hours passes between the delivery of consecutive puppies, and you know there are still more fetuses inside based on prior veterinary X-rays. This means the dam's uterine muscles have exhausted their calcium and energy stores and can no longer contract effectively.
-
Pathological Fluid Discharge: A foul-smelling black fluid, purulent pus, or dark green discharge (uteroverdin) flows from the vagina before the very first puppy is born. The appearance of green fluid indicates that a placental site has detached prematurely from the uterine wall. If the puppy is not delivered within minutes of this detachment, they will suffocate from a lack of oxygen inside the womb.
-
Gestational Overtime: The dam's pregnancy has extended past day 65 to 67 from her last breeding date without showing any initial signs of Stage 1 labor (nesting behavior, drop in rectal temperature below $37^\circ\text{C}$, or loss of appetite). This suggests that the hormonal trigger for labor has failed, risking the loss of the entire litter inside the uterus.
Clinical Conclusion and the Veterinary Emergency Triage System
The primary value of implementing canine first aid at home is to stabilize your pet's vital signs and extend their survival window long enough to reach professional care. First aid is a bridge, not a permanent cure. Once you have managed a hemorrhage, stabilized a fracture, or cooled an overheated dog, they must still be evaluated by a veterinary professional.
When you arrive at an emergency veterinary hospital, the medical team will instantly categorize your dog using the standard Veterinary Triage Scale. Understanding this clinical hierarchy helps set expectations during a high-stress situation:
                       VETERINARY TRIAGE HIERARCHY

  [ LEVEL 1: CRITICAL ]   ──► Respiratory arrest, severe shock, open chest wounds, GDV.
  [ LEVEL 2: URGENT ]     ──► Active hemorrhage, open fractures, proptosis, toxins.
  [ LEVEL 3: STABLE ]     ──► Mild vomiting, localized dermatitis, minor lameness.
-
Level 1: Critical (Immediate Lifesaving Care Required): This category includes dogs experiencing active cardiopulmonary arrest, complete airway obstruction, severe decompensated shock, pale blue mucous membranes, penetrating chest wounds, or gastric dilatation-volvulus (GDV/Bloat). These patients bypass the waiting room and go straight into the treatment area.
-
Level 2: Urgent (Immediate Stabilization Required): This includes dogs presenting with active, controlled hemorrhages, open limb fractures, ocular proptosis, recent toxic ingestions, or heat stroke with a stabilizing temperature. They are evaluated by a triage technician within minutes of arrival.
-
Level 3: Stable (Non-Life-Threatening): This includes dogs with mild vomiting, single episodes of diarrhea, minor lacerations with minimal bleeding, chronic lameness, or minor skin allergies. These patients are comfortable and will be seen after more critical emergencies are stabilized.
By mastering these first-aid protocols, maintaining a fully stocked canine emergency kit (containing sterile saline, gauze rolls, Vetrap, $3\%$ hydrogen peroxide, activated charcoal, and a digital thermometer), and remaining calm under pressure, you can protect your dog when they need it most. Your immediate, informed actions as a first responder can turn a terrifying crisis into a successful recovery, ensuring your companion stays safely by your side for years to come.
FAQ – Dog First Aid and Emergency Care
1. What should I do first if my dog has an emergency?
Stay calm and assess the situation quickly. Check whether your dog is breathing, conscious, and bleeding. Address immediate life-threatening issues such as severe bleeding, airway obstruction, or heat stroke, then contact a veterinarian and begin transport as soon as possible.
2. How can I stop severe bleeding in my dog?
Apply firm, direct pressure to the wound using sterile gauze or a clean cloth. Maintain continuous pressure for 5–10 minutes without lifting the dressing. If blood soaks through, add more layers on top rather than removing the original dressing.
3. Should I use a tourniquet on my dog?
Tourniquets should only be used in extreme situations involving catastrophic limb or tail injuries with life-threatening bleeding. Incorrect tourniquet use can cause severe tissue damage and loss of circulation.
4. How do I know if my dog has a broken bone?
Common signs include refusal to bear weight, visible deformity, swelling, pain, abnormal limb angles, or a grinding sensation when the area is touched. Any suspected fracture should be stabilized and evaluated by a veterinarian immediately.
5. Can I realign a broken bone at home?
No. Never attempt to push protruding bones back into place or straighten a fractured limb. Improper handling can worsen tissue damage, increase infection risk, and complicate surgical repair.
6. When should I induce vomiting after poisoning?
Vomiting may be appropriate only when the toxin was recently ingested, the dog is fully alert, and the substance is non-corrosive. Always contact a veterinarian or poison control center before inducing vomiting whenever possible.
7. When should I never induce vomiting?
Do not induce vomiting if your dog has swallowed corrosive chemicals, gasoline, kerosene, sharp objects, or if your dog is unconscious, weak, having seizures, or struggling to breathe.
8. Is activated charcoal effective for all toxins?
No. Activated charcoal can help bind many organic toxins, but it is generally ineffective against alcohols, antifreeze, heavy metals, and caustic substances. Veterinary guidance is strongly recommended before administration.
9. What are the signs of heat stroke in dogs?
Signs include excessive panting, drooling, bright red gums, weakness, vomiting, confusion, collapse, and body temperatures above normal. Heat stroke is a medical emergency requiring immediate cooling and veterinary treatment.
10. How should I cool an overheated dog?
Move the dog to a cool environment, apply cool (not ice-cold) water, and use fans to encourage evaporation. Monitor temperature closely and stop active cooling once the body temperature approaches normal.
11. Why should I avoid ice baths during heat stroke?
Ice baths can cause blood vessels near the skin to constrict, trapping heat inside the body and potentially worsening the dog's condition.
12. What should I do if my dog is hypothermic?
Move the dog indoors, dry them thoroughly, wrap them in warm blankets, and use towel-wrapped warm water bottles near the chest and abdomen. Seek veterinary care if symptoms are severe.
13. How long should I withhold food after vomiting?
A short fasting period of approximately 4–6 hours is often recommended to allow the stomach to rest. Water should be reintroduced gradually and carefully.
14. What should I feed my dog after diarrhea or vomiting improves?
A bland diet consisting of boiled skinless chicken and plain white rice is commonly used for short-term digestive recovery. Transition back to regular food gradually over several days.
15. What should I do if my dog's eye pops out of its socket?
Keep the eye moist with sterile saline or clean water and cover it gently with a wet sterile dressing. Do not attempt to push the eye back into the socket. Seek emergency veterinary care immediately.
16. How do I transport an injured dog safely?
Use a flat, rigid surface such as a board, blanket stretcher, or sturdy panel to support the dog's entire body. Minimize movement, especially if spinal or fracture injuries are suspected.
17. What should be included in a canine first aid kit?
A well-stocked kit should contain sterile saline, gauze pads, bandage rolls, cohesive wrap, blunt-tip scissors, tweezers, a digital thermometer, disposable gloves, activated charcoal, and emergency veterinary contact information.
18. How can I tell if my dog's condition is life-threatening?
Warning signs include difficulty breathing, collapse, severe bleeding, pale or blue gums, seizures, unconsciousness, heat stroke, major trauma, or suspected poisoning. These situations require immediate veterinary attention.
19. Can first aid replace veterinary treatment?
No. First aid is intended to stabilize your dog and prevent further injury until professional veterinary care is available. Even if symptoms improve, veterinary evaluation is often necessary.
20. What is the most important rule during a canine emergency?
Act quickly, remain calm, stabilize the immediate threat, and seek veterinary care as soon as possible. Early intervention greatly improves the chances of a successful recovery.


