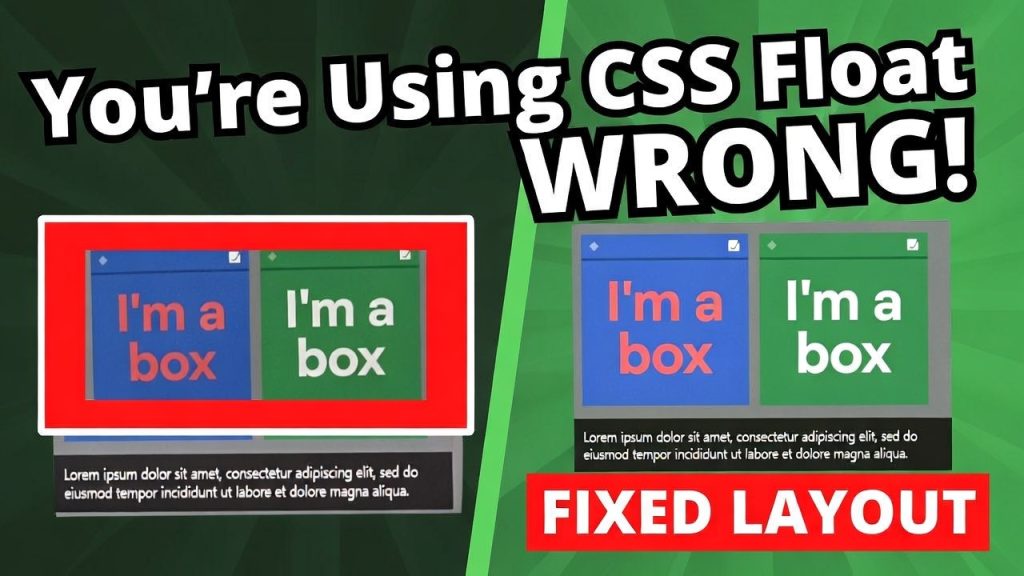
COMPLETE DEVELOPER GUIDE | CSS FUNDAMENTALS SERIES
1 bulan ago · Updated 1 bulan ago
To understand why parent containers collapse when their children are floated, we need to travel back to the origins of CSS and understand what the float property was designed to do and more importantly, what it was never designed to do.
CSS floats were introduced in CSS 1, published in 1996. Their original purpose was singular and modest: to allow text to flow around images, replicating the text-wrapping behavior that had been a staple of print layout for centuries. When a magazine places a photograph in the middle of an article and wraps the surrounding text around it, that is float behavior. The CSS float property was designed to bring that same capability to web pages.
For several years, this worked exactly as intended. Web pages used floats to position editorial images within text content, and the world was relatively simple. Then something changed. As web designers began to build increasingly complex layouts with multiple columns, sidebars, and grid-like arrangements, they discovered that floats could be abused pressed into service for purposes they were never designed to handle to create multi-column layouts. Before CSS Grid and Flexbox existed, float-based layouts were the primary mechanism for building anything more complex than a single-column page.
This abuse of the float property for structural layout purposes is what gave rise to the parent-collapse problem. When you float an image within a paragraph, the paragraph still contains its text content, which flows around the image the parent paragraph does not collapse. But when you float all of a container's children when every direct child is floated the parent has no non-floated content to wrap around, and CSS's normal block formatting context breaks down in a way that causes the parent to report its height as zero.
Understanding this historical context is crucial: the collapsed parent problem is not a bug in browsers. It is a predictable, specified consequence of how the CSS float model works. The 'fixes' we will explore — overflow:hidden and clearfix are workarounds for using floats in ways that CSS never anticipated. Modern layout tools (Flexbox and Grid) were specifically designed to handle multi-column layouts without any of these workarounds.
The CSS Box Model and Normal Document Flow
Before diving into the solutions, it is worth ensuring a solid understanding of how the CSS box model and document flow work, because both the problem and its solutions are rooted in these fundamentals.
In CSS's normal document flow, block-level elements (like div, p, h1, and article) are stacked vertically, each occupying the full available width and taking up as much vertical space as their content requires. A parent element's height is determined by the height of all its children combined: if the children collectively take up 500 pixels of vertical space, the parent reports a height of 500 pixels (assuming no explicit height is set). This is the behavior most developers intuitively expect.
When an element is floated — given float: left or float: right — it is removed from normal document flow. It no longer occupies space in the vertical stacking order. It moves to one side of its containing block, and the elements that follow it in the document flow wrap around it (for inline content) or ignore it entirely (for other block-level elements). This removal from normal flow is precisely what causes the parent to collapse: from the parent's perspective, floated children are invisible to the height calculation.
| CSS Float Values: What Each Does | |
| float: left | Removes element from normal flow; positions it against the left edge of its containing block; subsequent content flows to the right of it |
| float: right | Removes element from normal flow; positions it against the right edge of its containing block; subsequent content flows to the left of it |
| float: none | Default value; element participates in normal document flow; no floating occurs |
| clear: left | Forces the element below any left-floated elements — clears the float on the left side |
| clear: right | Forces the element below any right-floated elements — clears the float on the right side |
| clear: both | Forces the element below any floated elements on either side — the most common value in clearfix patterns |
| clear: none | Default value; element does not clear any floats |
Visualizing the Collapsed Parent
The best way to understand the collapsed parent problem is to see it in action. Consider the following HTML structure and CSS, which represents a typical two-column website layout:
| HTML — Two-column layout structure |
| <!-- HTML Structure -->
<div id="container"> <div id="main">Main content area</div> <div id="sidebar">Sidebar</div> </div> |
| CSS — Both children floated |
| /* CSS */
#container { background: red; width: 800px; padding-bottom: 2em; /* Should show red at bottom */ }
#main { background: green; height: 500px; width: 600px; float: right; /* Floated right */ }
#sidebar { background: blue; height: 500px; width: 200px; float: left; /* Floated left */ } |
| ● ● ● Result: Parent Has Zero Height — No Red Background Visible | |||
| #container { background: red; } — ZERO HEIGHT — red is invisible
Parent collapses because both children are floated #main { float: right; width: 600px; height: 500px; } #sidebar { float: left; width: 200px; height: 500px; } |
#container { background: red; } — ZERO HEIGHT — red is invisible
Parent collapses because both children are floated |
#main { float: right; width: 600px; height: 500px; } | #sidebar { float: left; width: 200px; height: 500px; } |
| #container { background: red; } — ZERO HEIGHT — red is invisible
Parent collapses because both children are floated |
|||
| #main { float: right; width: 600px; height: 500px; } | |||
| #sidebar { float: left; width: 200px; height: 500px; } | |||
| Figure 2 — The red container is invisible because it has collapsed to zero height; floated children overflow it |
The padding-bottom: 2em property on the container should produce a visible strip of red at the very bottom of the box — and yet it does not appear. This is because the container has effectively collapsed to zero height: it contains no block-formatting-context content to give it any height, and so there is no space for the padding to add to.
Solution 1 — The overflow:hidden Trick
How overflow:hidden Establishes a New Block Formatting Context
The overflow:hidden solution to the collapsed parent problem is elegant in its simplicity: adding a single CSS property to the parent element causes it to correctly contain its floated children. But why does it work? The mechanism is not immediately obvious, and understanding it deeply will help you predict when it will and will not be appropriate.
The key concept is the Block Formatting Context (BFC). A block formatting context is an independent CSS layout region with specific rules about how elements inside it interact with each other. Elements within a BFC are isolated from elements outside it in specific ways — most importantly, a BFC always contains its floated children in its height calculation.
By default, the root element (html) establishes a BFC, but most other block-level elements do not. When you float an element's children without establishing a BFC on the parent, the children's heights are not included in the parent's layout calculation — hence the collapse. But when you trigger a new BFC on the parent element, the rules change: the parent must now account for its floated children in its dimensions.
The CSS property overflow:hidden (along with overflow:auto, overflow:scroll, and several other properties) triggers the creation of a new block formatting context on the element it is applied to. This is why adding overflow:hidden to the parent container fixes the collapse: it forces the parent to become a BFC, which in turn forces it to contain and account for its floated children.
| 💡 What Triggers a Block Formatting Context?
Beyond overflow:hidden, several CSS properties trigger a new Block Formatting Context on an element: float (any value other than none), position: absolute or position: fixed, display: inline-block, display: table-cell, display: flex, display: grid, contain: layout or contain: paint, and the modern display: flow-root (which was specifically designed to create a BFC with no visual side effects). In modern CSS, display: flow-root is the cleanest way to trigger a BFC. |
Applying the Fix: One Line of CSS
The fix itself is startlingly simple. Remove any explicit height from the container, and add overflow:hidden:
| The overflow:hidden fix |
| /* THE FIX — add overflow:hidden to the parent container */
#container { background: red; width: 800px; padding-bottom: 2em; overflow: hidden; /* ← This single property fixes the collapse */ }
/* Do NOT set an explicit height on the container */ /* The container will now grow to contain its floated children */ |
| ● ● ● After overflow:hidden — Parent Now Contains Its Children | ||||
| #container (red background — now visible!)
overflow:hidden triggers Block Formatting Context #main (float: right) green — contained! #sidebar (float: left) blue — contained! #container padding-bottom: 2em — now visible at bottom Red background shows at bottom — padding works! |
#container (red background — now visible!)
overflow:hidden triggers Block Formatting Context |
#main (float: right) green — contained! | #sidebar (float: left) blue — contained! | #container padding-bottom: 2em — now visible at bottom
Red background shows at bottom — padding works! |
| #container (red background — now visible!)
overflow:hidden triggers Block Formatting Context |
||||
| #main (float: right) green — contained! | ||||
| #sidebar (float: left) blue — contained! | ||||
| #container padding-bottom: 2em — now visible at bottom
Red background shows at bottom — padding works! |
||||
| Figure 3 — After adding overflow:hidden, the red container properly wraps both floated children |
| ⚠️ Important: Remove Explicit Heights
A critical part of making this fix work is removing any explicit height property from the container. As Jeffrey Way notes: 'try to avoid specifying heights as much as possible. There is usually a smarter method.' If you set height: 50px on the container, the overflow:hidden will clip the children at that height rather than expanding to contain them. Let the container's height be determined naturally by its content. |
The overflow:hidden Values Explained
| CSS overflow Property Values | |
| overflow: visible | Default. Content is not clipped; it may overflow outside the element's box. Does NOT establish a BFC. |
| overflow: hidden | Content that overflows is clipped and invisible. Establishes a BFC. The most common fix for collapsed parents. |
| overflow: scroll | Content is clipped but scrollbars are always shown (even when not needed). Establishes a BFC. |
| overflow: auto | Content is clipped and scrollbars appear only when needed. Establishes a BFC. Good for scrollable containers. |
| overflow: clip | Modern: Similar to hidden but does NOT establish a BFC. Available in modern browsers. |
| overflow-x / overflow-y | Longhand properties for controlling overflow independently on horizontal and vertical axes. |
When overflow:hidden Breaks Things
The overflow:hidden trick is fast, simple, and works in the vast majority of float containment scenarios. But it has one important limitation: by definition, any content that would visually extend beyond the container's boundaries will be clipped — cut off and made invisible.
This limitation becomes a real problem when you need content to visually break out of the container's boundaries. Dropdown navigation menus that extend below a navigation bar, tooltips that appear outside their triggering element, image overlays positioned on the edge of a card, or absolutely positioned decorative elements like the 'Buy Now' circle badge in the original article — all of these require content to overflow the container, and all of them will be silently clipped by overflow:hidden.
| ● ● ● The Problem: overflow:hidden Clips Positioned Children | |||
| #container { overflow: hidden; position: relative; }
overflow:hidden clips EVERYTHING outside the container Main content — safely inside container bounds ◉ CLIPPED — Button/Badge positioned outside box is invisible! img { position: absolute; right: -60px; } — gets clipped! |
#container { overflow: hidden; position: relative; }
overflow:hidden clips EVERYTHING outside the container |
Main content — safely inside container bounds | ◉ CLIPPED — Button/Badge positioned outside box is invisible!
img { position: absolute; right: -60px; } — gets clipped! |
| #container { overflow: hidden; position: relative; }
overflow:hidden clips EVERYTHING outside the container |
|||
| Main content — safely inside container bounds | |||
| ◉ CLIPPED — Button/Badge positioned outside box is invisible!
img { position: absolute; right: -60px; } — gets clipped! |
|||
| Figure 4 — overflow:hidden clips absolutely positioned children that extend beyond the container's edges |
In these situations, the overflow:hidden trick is unsuitable, and we need the clearfix technique instead. The clearfix achieves the same parent-containment goal without restricting overflow, allowing content to extend beyond the container's visual boundaries.
Solution 2 — The CSS Clearfix
Understanding the Clearfix Concept
The clearfix is a CSS technique with a slightly longer history and a more complex implementation than the overflow:hidden approach. Its core concept is simple: to make a parent contain its floated children, insert an element after those children that clears the floats. When a clearing element follows floated elements, CSS pushes it below all floated content — and because the clearing element is a regular in-flow element (not floated itself), it forces the parent to extend its height to include it.
The naive implementation of this concept would be to add an empty HTML element — a div with clear:both — after the floated content in the HTML markup:
| The unsemantic approach — avoid this |
| <!-- Naive (unsemantic) clearfix — DO NOT USE this approach -->
<div id="container"> <div id="main">Main content</div> <div id="sidebar">Sidebar</div> <div style="clear: both;"></div> <!-- empty div just to clear floats --> </div> |
This works, but it is widely considered bad practice. Adding empty, presentational div elements to HTML markup violates the principle of separation of concerns — HTML should describe content and structure, while CSS should handle presentation. An empty div whose only purpose is to clear a float is pure presentation; it has no business being in the HTML.
The Pure-CSS Clearfix with :after
The CSS-only clearfix solution uses the CSS :after pseudo-element to inject the clearing content after the container element without touching the HTML. The :after pseudo-element generates synthetic content after an element's content in the document, which can then be styled — in this case, made to clear the floats, be visually hidden, and take up no space.
| The classic CSS clearfix implementation |
| /* THE CLEARFIX — Applied to the parent container */
#container { background: red; width: 800px; padding-bottom: 2em; _height: 1%; /* IE6 hack: triggers 'hasLayout' using underscore trick */ }
#container:after { content: "."; /* Append a period (any content works) */ visibility: hidden; /* Hide the period from view */ display: block; /* Force it to be a block element */ clear: both; /* Clear both left and right floats */ height: 0; /* Take up no vertical space */ font-size: 0; /* Firefox precaution: prevents phantom space */ } |
| Clearfix Properties: Why Each Is Needed | |
| _height: 1% | IE6-specific hack using underscore prefix (IE ignores property names with underscores). Triggers IE6's proprietary 'hasLayout' mode, which fixes float containment in that browser. |
| content: "." | The :after pseudo-element requires a content value to render. Any content works; a period is conventional. Without content, the pseudo-element does not render and the clearfix fails. |
| visibility: hidden | Hides the period character from view without removing it from the document flow. Unlike display:none, the element still participates in layout and still clears the floats. |
| display: block | Overrides the default inline display of :after content. The clear property only works on block-level elements; without display:block, clear:both would have no effect. |
| clear: both | The essential property. Forces the generated content below all preceding floated elements on both sides, stretching the parent to contain them. |
| height: 0 | Prevents the generated content from adding any visible height to the container. Combined with font-size:0, ensures the pseudo-element is truly invisible. |
| font-size: 0 | Prevents Firefox from adding a small amount of default spacing after the pseudo-element. A historical quirk that required this additional safeguard. |
The Modern Clearfix: Simplified
The original clearfix, as shown above, was written to support Internet Explorer 6 and Firefox's historical rendering quirks — both of which are long obsolete. Modern clearfix implementations are significantly cleaner. The most widely used modern clearfix uses the ::after pseudo-element with empty string content:
| Classic Clearfix (IE6 Compatible) | Modern Clearfix (2024) |
| .clearfix {
_height: 1%; /* IE6 */ } .clearfix:after { content: "."; visibility: hidden; display: block; clear: both; height: 0; font-size: 0; } |
.clearfix::after {
content: ""; display: table; clear: both; }
/* Or even simpler (Flexbox era): */ .container { display: flow-root; } |
Figure 5 — Classic clearfix vs. modern clearfix: significantly cleaner with no legacy hacks needed
| ✅ The Modern Best Practice: display:flow-root
In 2024, the cleanest solution for establishing a block formatting context (and containing floated children) is the CSS property display:flow-root. Added to CSS Display Level 3, it does exactly one thing: creates a new block formatting context with no visual side effects. Unlike overflow:hidden it does not clip overflow; unlike the clearfix it requires no pseudo-element hack. Browser support is excellent (all modern browsers). For new projects, display:flow-root is the preferred approach. |
Clearfix vs. overflow:hidden — Making the Right Choice
Both solutions solve the same core problem — the collapsed parent — but each has scenarios where it is the better choice. Understanding the trade-offs enables you to select the right tool confidently.
| Feature | overflow: hidden | Clearfix | Modern (Flexbox/Grid) |
| Browser support | All browsers | All browsers (IE6+) | All modern browsers |
| Allows overflow | No — clips content | Yes — allows overflow | Yes — allows overflow |
| Positioned children | Clips overflow | Works fine | Works fine |
| Code complexity | One line | 5–6 lines | One line |
| Semantic HTML | Clean | Requires after hack | Clean |
| Use case | Simple containers | Complex layout needs | New projects preferred |
In practice, the decision often comes down to a single question: does any content need to visually extend beyond the container's boundaries? If the answer is no — the container is a self-contained visual unit with no overhanging elements — overflow:hidden is simpler and perfectly appropriate. If the answer is yes — dropdown menus, positioned badges, tooltips, or any other content that breaks out of the box — use the clearfix or display:flow-root instead.
Positioning Context and the overflow:hidden Conflict
CSS Positioning: A Quick Refresher
The conflict between overflow:hidden and absolutely positioned children — demonstrated in the original article with a circular 'Buy Now' button positioned on the edge of the container — arises from the interaction between two orthogonal CSS systems: the overflow model and the positioning context model. Understanding both systems makes the conflict, and its solution, immediately clear.
CSS has five positioning modes: static (the default, in normal flow), relative (offset from normal position, still in flow), absolute (removed from flow, positioned relative to nearest positioned ancestor), fixed (removed from flow, positioned relative to viewport), and sticky (hybrid of relative and fixed). An absolutely positioned element is placed relative to its nearest ancestor that has a positioning value other than static — this is called its positioning context or containing block.
When no ancestor has a non-static position, an absolutely positioned element uses the initial containing block (essentially the viewport) as its reference — which is almost never what you want for layout-relative positioning. This is why position:relative on the container is necessary before using position:absolute on a child.
The Conflict in Practice
Here is the scenario from the original article: we want to position a circular badge image on the top-right corner of our container, partially overlapping its edge. We set position:relative on the container (to establish a positioning context) and position:absolute; right:-60px; top:20px on the image (to place it on the right edge).
| The conflict: overflow:hidden clips the intentionally overhanging badge |
| /* What we want */
#container { background: red; width: 800px; position: relative; /* ← Establishes positioning context for the badge */ overflow: hidden; /* ← Clips our badge! Problem! */ }
img.badge { position: absolute; right: -60px; /* ← Intentionally overhangs the right edge */ top: 20px; } |
The problem is that overflow:hidden and right:-60px are working against each other. The badge is intentionally positioned outside the container's right edge (hence the negative right value), but overflow:hidden clips everything that extends beyond the container's boundaries. The badge becomes invisible — not because anything is wrong with the positioning math, but because we have told the browser to hide any overflow, and the badge is overflow.
This is not a bug — both properties are working exactly as specified. It is a design conflict that requires choosing between the two approaches. The solution is to use clearfix for float containment instead of overflow:hidden, which frees up the container's overflow to be visible.
The Solution: Use Clearfix When Overflow Is Needed
| Clearfix allows the badge to overhang without being clipped |
| /* Solution: remove overflow:hidden, use clearfix instead */
#container { background: red; width: 800px; padding-bottom: 2em; position: relative; /* Keep for positioning context */ _height: 1%; /* IE6 hasLayout trigger */ /* NO overflow:hidden here */ }
#container:after { content: ""; display: table; clear: both; }
img.badge { position: absolute; right: -60px; /* Now visually overhangs — not clipped! */ top: 20px; } |
| ● ● ● Clearfix Solution — Float Contained AND Badge Overhangs Correctly | ||||
| #container (red) — clearfix contains floats, overflow visible
#main (green, float:right) — contained by clearfix #sidebar (blue, float:left) — contained by clearfix #container padding-bottom — red visible at bottom ◉ Badge image can now overhang edge — not clipped! |
#container (red) — clearfix contains floats, overflow visible | #main (green, float:right) — contained by clearfix | #sidebar (blue, float:left) — contained by clearfix | #container padding-bottom — red visible at bottom
◉ Badge image can now overhang edge — not clipped! |
| #container (red) — clearfix contains floats, overflow visible | ||||
| #main (green, float:right) — contained by clearfix | ||||
| #sidebar (blue, float:left) — contained by clearfix | ||||
| #container padding-bottom — red visible at bottom
◉ Badge image can now overhang edge — not clipped! |
||||
| Figure 6 — Clearfix contains the floated children while allowing the badge image to visually overflow the container edges |
The Modern Approach — Flexbox and CSS Grid
Why Float-Based Layouts Became Obsolete
The float containment problem, along with the clearfix workarounds it required, was always a symptom of using the wrong tool for the job. CSS floats were designed for text wrapping, not for multi-column layout. The entire ecosystem of float-based layout techniques — column floats, clearfixes, faux-column backgrounds, and negative margin tricks — was an elaborate workaround for the absence of proper layout tools in CSS.
CSS Flexbox (Flexible Box Layout) was introduced to address exactly this gap. First available in browsers around 2012–2014 and now universally supported, Flexbox provides a proper model for distributing space among items in a container, aligning them on one or two axes, and controlling how they respond to available space. Critically, a flex container always contains its flex items — there is no float, no collapse, and no need for overflow or clearfix tricks.
| Modern Flexbox layout — replaces float-based two-column layout |
| /* Modern Flexbox equivalent — no floats, no clearfix, no overflow tricks */
#container { background: red; width: 800px; padding: 20px; display: flex; /* ← Makes this a flex container */ gap: 0; /* ← Optional: space between flex items */ }
#main { background: green; flex: 1; /* ← Grow to fill available space */ order: 2; /* ← Display after sidebar */ }
#sidebar { background: blue; width: 200px; /* ← Fixed sidebar width */ flex-shrink: 0; /* ← Don't shrink below 200px */ order: 1; /* ← Display before main */ }
/* Result: container always contains both children. No float, no clearfix, no overflow: hidden needed. */ |
CSS Grid: The Layout System CSS Was Always Missing
While Flexbox revolutionized one-dimensional layout (items in a row or a column), CSS Grid — introduced in browsers in 2017 and now universally supported — brought genuine two-dimensional layout capability to CSS. CSS Grid defines layout explicitly through named areas, tracks, and explicit placement, eliminating virtually every scenario where floats were historically used for layout purposes.
| CSS Grid layout — the most explicit and powerful approach |
| /* CSS Grid — the ultimate two-column layout solution */
#container { background: red; width: 800px; padding: 20px; display: grid; grid-template-columns: 200px 1fr; /* sidebar: 200px, main: fills rest */ grid-template-areas: "sidebar main"; }
#sidebar { background: blue; grid-area: sidebar; }
#main { background: green; grid-area: main; }
/* The container's red background is always visible. No floats, no clearfix, no overflow tricks needed. */ |
| Modern Layout Techniques: When to Use Each | |
| display: flex | One-dimensional layouts: navigation bars, button groups, card rows, centered content, any layout along a single axis (row or column) |
| display: grid | Two-dimensional layouts: page structure, card grids, magazine-style layouts, any layout requiring control over both rows AND columns simultaneously |
| display: flow-root | When you need float containment with no other layout changes — the modern replacement for overflow:hidden as a BFC trigger |
| float (modern use) | Still appropriate for text-wrapping images inline within content — the original purpose. Do not use for multi-column structural layout. |
| overflow: hidden | Use for clipping content that genuinely should not overflow (image galleries, card thumbnails); secondary use as BFC trigger is now superseded by flow-root |
Practical Scenarios and Decision Guide
Scenario 1: Simple Two-Column Layout (No Overflow Needed)
You are building a blog page with a main content area and a sidebar. Both are fixed-height columns. No decorative elements need to overhang the container. This is the simplest case.
- Modern approach: Use display:flex on the container. Zero additional properties needed.
- Float approach: Float the children, add overflow:hidden to the parent. Single-line fix.
- Avoid: explicit height on container, clearfix (unnecessary in this simple case).
Scenario 2: Container with Overhanging Decorative Elements
You are building a promotional card or hero section where a badge, button, or decorative circle needs to visually break out of the card's boundary. Classic example from the original article.
- Modern approach: Use display:flex or display:grid. Absolute positioning on child works without any restrictions.
- Float approach: Use clearfix instead of overflow:hidden. Add position:relative to parent for positioning context.
- Avoid: overflow:hidden when any child needs to overhang the container boundary.
Scenario 3: Dropdown Navigation Menu
A navigation bar uses floated or flex items for the menu links. Hovering over a link reveals a dropdown submenu that extends below the navbar. The navbar must contain the menu items but allow the dropdown to overflow below.
- Modern approach: Use display:flex for the navbar. Absolutely position the dropdown relative to its li parent.
- Float approach: Use clearfix on the nav container. overflow:hidden would clip the dropdown.
- Key insight: Any time a dropdown, tooltip, or popup extends beyond its trigger's parent, that parent cannot have overflow:hidden.
Scenario 4: Equal-Height Columns
You want two or more columns to always be the same height, regardless of content length — a classic layout challenge that was extremely difficult with floats. One column might have two lines of text; the other might have twenty. With floats, the shorter column would just end earlier.
-
- Modern approach: display:flex with align-items:stretch (the default). Equal-height columns with zero additional code.
- Float approach: The 'faux columns' hack — use background images on a wrapper to simulate equal heights. Extremely hacky and high-maintenance.
- Verdict: This is one scenario where there is no good float-based solution. Use Flexbox or Grid.
| 🚀 The Modern Developer's Flowchart
For new projects (2024): Use Flexbox for one-dimensional layouts, CSS Grid for two-dimensional layouts. Floats should only be used for their intended purpose: wrapping text around images. If you encounter a legacy codebase using float-based layouts: (1) If overflow:hidden is already there and working, leave it unless you need overflow; (2) If you need content to overflow, switch to clearfix or display:flow-root; (3) If you have the opportunity to refactor, migrate to Flexbox/Grid. |
Cross-Browser Considerations and Legacy Support
Internet Explorer and the hasLayout Concept
The original article's clearfix includes the somewhat mysterious _height: 1% property with an underscore prefix. This targets Internet Explorer 6 exclusively, using a quirk of IE's CSS parsing: properties prefixed with an underscore are ignored by standards-compliant browsers but accepted by IE6. The value 1% triggers what IE6 calls 'hasLayout' — a proprietary internal state that changes how IE6 handles element sizing and containment.
'hasLayout' was an IE-specific concept that essentially determined whether an element was responsible for its own sizing and positioning. An element with hasLayout would correctly contain its floated children; one without it would exhibit the collapsed parent behavior even when overflow:hidden was applied. Setting _height: 1% was one of several ways to trigger hasLayout without affecting other browsers.
In 2024, Internet Explorer is completely defunct. Microsoft officially ended support for IE11 in June 2022, and no current project should include IE6-specific hacks. These properties are mentioned here for historical context and for understanding legacy codebases, not as a recommendation for new code.
Modern Browser Support Matrix
| Feature Browser Support (2024) | |
| overflow: hidden | Universal — All browsers including IE6+. Fully safe to use everywhere. |
| ::after pseudo-element | Universal — IE8+. The double-colon syntax is modern standard; single-colon :after works in IE8/9 for compatibility. |
| clear: both | Universal — All browsers including IE6+. The core property of any clearfix. |
| display: flex | Universal — Chrome 29+, Firefox 28+, Safari 9+, IE 11+, Edge 12+. No vendor prefixes needed in 2024. |
| display: grid | Universal — Chrome 57+, Firefox 52+, Safari 10.1+, Edge 16+. IE11 has partial Grid support with -ms- prefix. |
| display: flow-root | Modern — Chrome 58+, Firefox 53+, Safari 13+, Edge 79+. Not supported in IE11. |
| position: sticky | Modern — Chrome 56+, Firefox 32+, Safari 13+, Edge 16+. Not supported in IE. |
Complete Code Reference
The Classic Two-Column Layout — Three Ways
| Three methods for containing floated children |
| /* ===================================
METHOD 1: overflow:hidden Best when: simple container, no overflow needed =================================== */
#container-v1 { background: red; width: 800px; overflow: hidden; /* Single-line fix */ }
/* =================================== METHOD 2: Clearfix Best when: overflow content (dropdowns, badges) =================================== */
#container-v2 { background: red; width: 800px; } #container-v2::after { content: ""; display: table; clear: both; }
/* =================================== METHOD 3: display:flex (Modern — Recommended) Best when: new projects, clean code =================================== */
#container-v3 { background: red; width: 800px; display: flex; /* Automatically contains children */ }
/* Shared child styles */ #main { background: green; flex: 1; } #sidebar { background: blue; width: 200px; flex-shrink: 0; } |
The Reusable Clearfix Utility Class
| Reusable clearfix utility class |
| /* Add .clearfix to any container that needs float containment */
/* Works in all modern browsers (IE8+) */
.clearfix::after { content: ""; display: table; clear: both; }
/* Usage in HTML: */ /* <div class="container clearfix"> <div style="float:left">Left</div> <div style="float:right">Right</div> </div> */
/* The clearfix class can be applied to any element */ /* that needs to contain its floated children */ |
Decision Tree: Choosing the Right Technique
| Your Situation | Best Solution |
| New project, modern browsers | display:flex or display:grid |
| Simple container, no overflow needed | overflow:hidden — one line |
| Container has dropdown/tooltip/badge overflow | Clearfix (::after) or display:flow-root |
| Need equal-height columns | display:flex with align-items:stretch |
| Text wrapping around an image | float — this is its correct use! |
| Legacy codebase, IE11 support needed | Clearfix with display:table |
| Legacy codebase, IE8 support needed | Clearfix with visibility:hidden approach |
| Full page structural layout | CSS Grid with named template areas |
Conclusion: Mastering Containment for Reliable CSS
The collapsed parent problem is one of the most disorienting experiences for developers learning CSS. You write what seems like perfectly reasonable code — a container with a background color and two content divs inside it — and the container appears to have no height at all. The children are there, rendered correctly, but the parent ignores them completely. It feels like a bug. It is not a bug.
Understanding why the problem occurs — that floated children are removed from normal document flow and therefore excluded from the parent's height calculation — transforms a mysterious glitch into a predictable behavior that can be managed with the right technique. Once you understand that overflow:hidden works by establishing a new Block Formatting Context, and that the clearfix works by injecting a clearing element via the :after pseudo-element, you have not just memorized two tricks — you understand the underlying CSS layout model well enough to adapt to new situations.
The choice between the two classic techniques comes down to one question: does any content need to visually overflow the container? Yes — use clearfix. No — overflow:hidden is simpler. In modern CSS development, the answer to this question is increasingly 'use Flexbox' or 'use Grid,' which sidestep the problem entirely by providing layout models that always contain their children without any workarounds.
As Jeffrey Way noted in his original conclusion: 'Though the overflow:hidden trick is preferable, it is not always ideal. You need to use the best solution for the task at hand. The important thing is to learn each method, so that you have the tools to solve the puzzle.' In 2024, the toolkit has expanded significantly with Flexbox and Grid, but the fundamental principle remains unchanged: understand each tool's behavior, know its trade-offs, and choose deliberately based on what your specific layout requires.
The CSS float model, the block formatting context, the clearfix pattern, and their modern successors — Flexbox and Grid — are not separate subjects. They are chapters in the same story: the evolution of CSS layout from a single-column document presentation language into a system capable of expressing any visual arrangement imaginable. Understanding that story gives you not just solutions to today's layout problems, but the conceptual foundation to solve layout problems you have not yet encountered.
FAQ – CSS Float, Collapsed Parent & Layout Techniques
1. What is the main cause of a collapsed parent in CSS?
A collapsed parent occurs when all child elements are floated. Since floated elements are removed from the normal document flow, the parent container does not calculate their height, resulting in a height of zero.
2. Is the collapsed parent issue a browser bug?
No, it is not a bug. It is expected behavior defined by the CSS specification. Floated elements are intentionally excluded from normal flow calculations.
3. Why does float remove elements from normal flow?
The float property was originally designed to wrap text around images, not for layout. When applied, it shifts elements to the left or right and removes them from the standard vertical stacking order.
4. What is the simplest way to fix a collapsed parent?
The simplest fix is:
overflow: hidden;
}
This works by creating a Block Formatting Context (BFC), forcing the parent to include floated children.
5. What is a Block Formatting Context (BFC)?
A BFC is an isolated layout environment in CSS where elements are laid out independently. One key feature is that it contains floated children, preventing collapse.
6. When should I avoid using overflow: hidden?
Avoid it when:
-
You have dropdown menus
-
Tooltips or popups
-
Elements that extend outside the container
Because overflow: hidden will clip (hide) anything outside the container.
7. What is clearfix in CSS?
Clearfix is a technique that uses a pseudo-element to clear floats without adding extra HTML.
Modern version:
content: "";
display: table;
clear: both;
}
8. How does clearfix work?
It inserts an invisible element after floated children that uses clear: both, forcing the parent container to expand and include those children.
9. What is the best modern solution to replace clearfix?
Use:
display: flow-root;
}
This creates a BFC without side effects like clipping.
10. Should I still use floats for layout in modern development?
No. Floats should only be used for text wrapping. For layout, use:
-
display: flex (Flexbox)
-
display: grid (CSS Grid)
11. What is the difference between Flexbox and Grid?
-
Flexbox → One-dimensional layout (row OR column)
-
Grid → Two-dimensional layout (rows AND columns)
12. Why is Flexbox better than float-based layouts?
Flexbox:
-
Automatically contains children
-
No collapsing issues
-
Easier alignment and spacing
-
Cleaner and more predictable code
13. What happens if I set a fixed height on a parent container?
If combined with overflow: hidden, content may be cut off instead of expanding. It’s best to avoid fixed heights unless necessary.
14. What is clear: both used for?
It forces an element to move below all floated elements on both sides. It is the core of the clearfix technique.
15. Can I use both position: absolute and float together?
Yes, but be careful:
-
Floated elements affect layout flow
-
Absolutely positioned elements are removed from flow and positioned relative to a parent
16. Why does overflow: hidden conflict with positioned elements?
Because it hides any content that extends beyond the container boundaries, including absolutely positioned elements.
17. What is the cleanest solution for modern layouts?
Use:
-
Flexbox for simple layouts
-
CSS Grid for complex layouts
-
flow-root only if you must handle floats
18. When is float still useful today?
Only for:
-
Wrapping text around images
Example:
float: left;
margin-right: 10px;
}
19. What is the biggest takeaway about float issues?
Float problems are not bugs—they are limitations of an old system being used for modern layouts.
20. What is the recommended approach for new projects?
-
Avoid floats for layout
-
Use Flexbox or Grid
-
Use flow-root instead of clearfix
-
Keep layout simple and modern
Tinggalkan Balasan