The Architecture of Feline Pediatric Desensitization: An Authoritative Guide to Kitten Grooming, Handling, and Long-Term Behavioral Modification
1 month ago
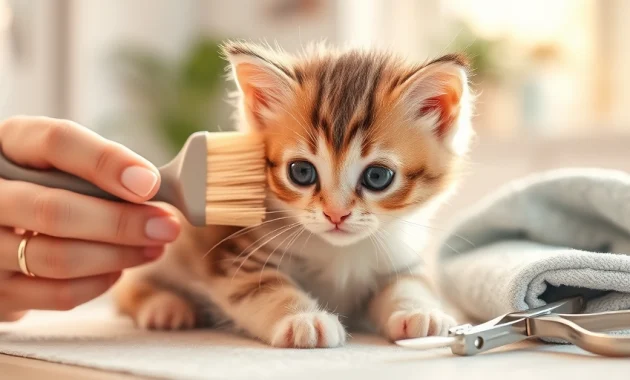
Grooming a companion kitten (Felis catus) during its early development is far more than a basic cosmetic chore. In modern veterinary behavior and preventative medicine, grooming serves as a structured protocol for handling, desensitization, and preventative healthcare.
When you introduce a young kitten to grooming tools, water, and handling, you take advantage of their critical neurological development windows. Helping them form positive associations with these experiences prevents fear-based aggression, chronic stress, and defensive behaviors during veterinary visits and grooming sessions later in life.
From a physiological perspective, a consistent grooming routine is essential for maintaining skin and coat health. It removes dead fur from the undercoat, stimulates healthy circulation, prevents painful fur matting (pelage felting), and significantly reduces the amount of loose fur the cat swallows, preventing hazardous hairballs (trichobezoars).
This comprehensive guide breaks down the science behind early feline socialization and provides step-by-step instructions for managing their coat, trimming nails, and introducing water therapy safely.
The Neurobiology of Early Feline Handling and Desensitization
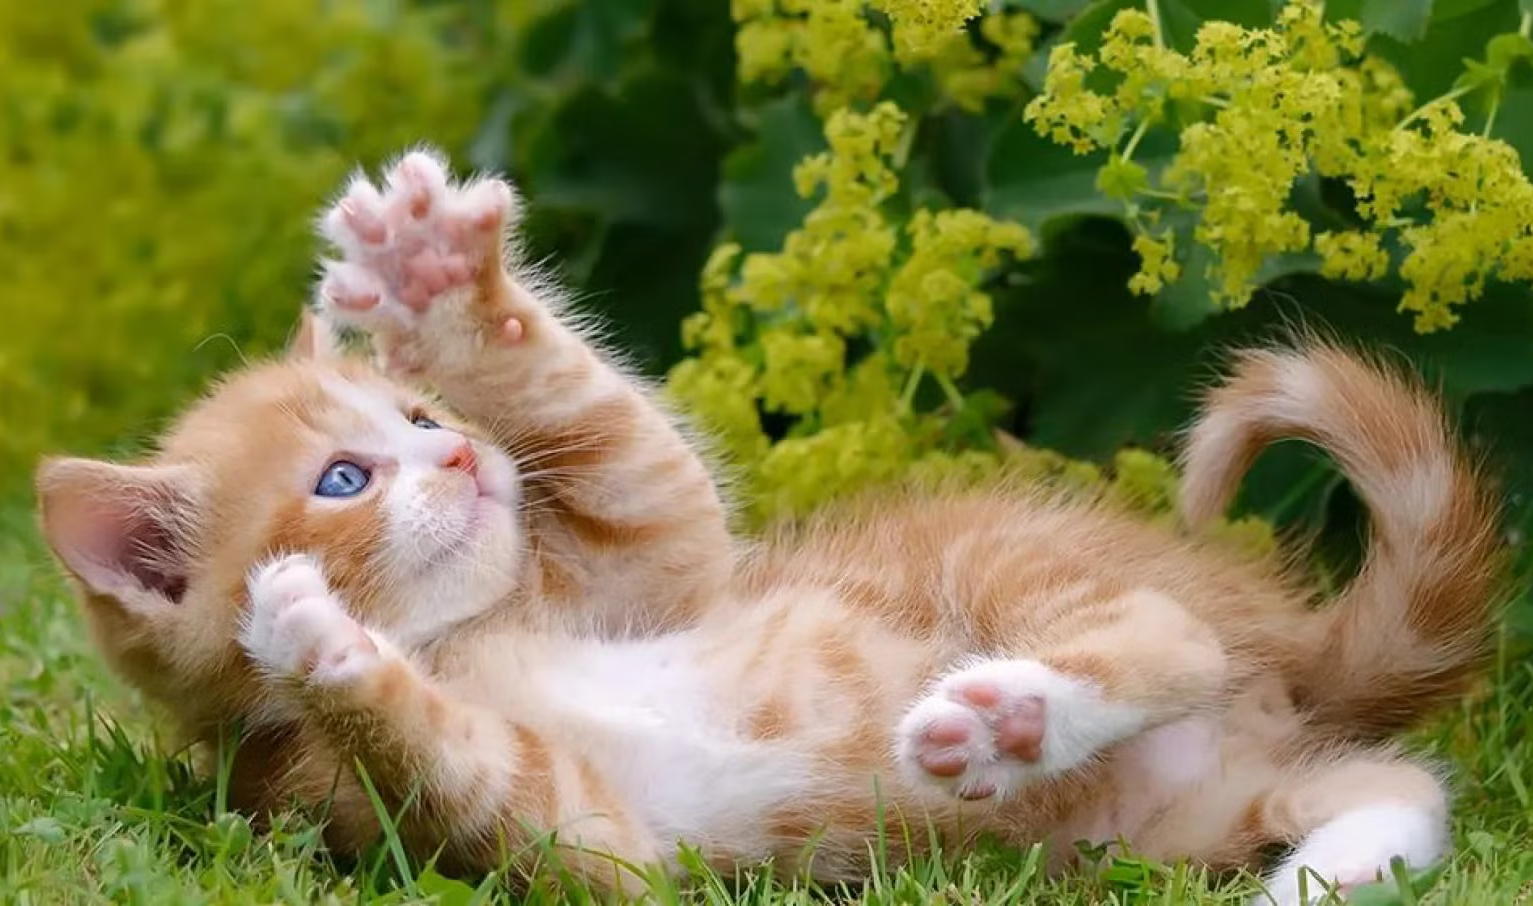
To successfully groom a kitten, you must first understand how their brain develops and processes new experiences. The window for primary socialization in kittens is remarkably short, typically peaking between 2 and 7 weeks of age, though it remains highly adaptable up to 16 weeks.
[Primary Socialization Window] ──► [Juvenile Integration Phase] ──► [Adult Baseline Behavior]
      (Weeks 2 to 7)                     (Weeks 8 to 16)                  (Months 12+)
 Peak neurological openness.        Active habituation to tools.     Established stress threshold.
During this sensitive period, the kitten's brain is rapidly forming neural connections. New sensory inputs—such as the texture of a brush, the sound of running water, or having their paws held—are cataloged as safe and normal parts of their environment rather than threats.
If a kitten is not handled or groomed during this early window, its natural survival instincts take over. As they mature, any unfamiliar physical restraint or touch can trigger an immediate, intense fear response, activating their sympathetic nervous system (the fight-or-flight response). This leads to a surge of adrenaline and cortisol, causing the cat to scratch, bite, or try to escape.
By using systematic desensitization (gradually introducing new sensations at a low level) and counter-conditioning (linking those sensations directly to high-value rewards), you can teach the kitten to remain calm, relaxed, and cooperative during handling.
Trichological Maintenance: Systematic Brushing and Coat Health
The way you approach brushing depends entirely on the kitten's specific coat type. Shorthaired breeds (like the British Shorthair or domestic shorthair moggies) generally need a thorough brushing once a week. Longhaired or dense-coated breeds (such as the Persian, Maine Coon, or Ragdoll) require daily brushing to prevent severe tangles and mats.
                      [Systematic Brushing Matrix]
                                   │
         ┌─────────────────────────┼─────────────────────────┐
         ▼                         ▼                         ▼
 [Step 1: Low-Stakes Zones]  [Step 2: Lateral Flanks]  [Step 3: High-Stress Zones]
 Start on the shoulders and  Progress to the sides     Carefully brush the belly,
 back with gentle strokes.   as comfort increases.     groin, and base of tail.
Step-by-Step Brushing Protocol
-
Low-Stakes Acclimation: Place the kitten comfortably on your lap when they are already relaxed or sleepy. Do not immediately bring out heavy steel combs. Instead, start by petting the kitten using your hands, then smoothly transition to using a soft-bristled brush or a gentle silicone curry comb. Focus on the low-stress areas where cats naturally prefer to be petted: the top of the head, the cheeks, and the shoulders.
-
Lateral Progressions: Once the kitten begins to purr and relaxes their muscles, slowly move the brush down their back and along their sides (lateral flanks). Keep your strokes short, gentle, and moving in the natural direction of hair growth.
-
Handling Sensitive Zones: The belly (ventrum), chest, armpits (axillae), and the base of the tail are highly sensitive areas where mats form easily, but they are also zones where cats feel vulnerable. To brush these areas safely, gently lift the front legs while offering a lickable treat. Work in brief 5-to-10-second intervals to avoid overwhelming the kitten.
-
Integrated Health Checks: Use these quiet moments to carefully check the skin for signs of external parasites (like fleas or ear mites), redness, or small skin lumps. Gently lift the lips to look at the gums and teething progress, and look inside the ears to ensure they are clean and pink. Always end the session with direct praise and a favorite treat to leave a lasting, positive impression.
Ungual Management: Safe and Precise Nail Trimming
Trimming a kitten's claws regularly is essential for indoor cats. It keeps their nails from catching on fabrics, prevents painful ingrown claws, and helps reduce accidental scratches during play.
                       [Anatomy of a Kitten Claw]

                            / \
                           /   \
                          /     \
                         /  /\   \
                        /  /  \   \
                       /  / ◄──┼───   The Pink Quick (Blood Vessels & Nerves)
                      /  /     \   \  [DO NOT CUT HERE]
                     /  /_______\   \
                    /_/______________\
                           ▲
                           │
             [Safe Cutting Zone: Clear Tip Only]
Step-by-Step Nail Trimming Protocol
-
Paw Desensitization: Long before you introduce nail clippers, get the kitten used to having their paws touched. During quiet times, gently massage their legs, hold their paws, and practice softly pressing the center pad to extend the hidden, retractile claws. Rewarding them during this process teaches them that paw handling is entirely safe.
-
Identifying the Quick: Hold the kitten securely against your body and gently press a toe pad to extend the claw. Look closely at the nail structure in bright light. You will see a pink, sensitive inner core called the quick, which contains live blood vessels and nerve endings. The area beyond this pink zone is dead, clear keratin.
-
Executing the Trim: Using sharp, specialized feline nail trimmers, hold the clipper at a slight angle and clip only the sharp, translucent tip of the nail, staying well clear of the pink quick. If you accidentally cut into the quick, it will bleed and cause sudden pain. Keep styptic powder or cornstarch nearby to quickly press onto the tip of the nail to stop any bleeding.
-
Pacing the Session: You do not need to trim all twenty claws in a single sitting. If the kitten becomes restless or impatient after two or three nails, stop immediately, reward them, and try again later when they are calm.
Hydrotherapy: Safe Introduction to Bathing
Most adult cats rarely need a full immersion bath because they groom themselves efficiently. However, introducing a kitten to water early in life is incredibly valuable. It prepares them for future situations where a bath might be medically necessary, such as treating a skin condition, removing hazardous chemicals, or managing severe diarrhea.
                    [Hydrotherapy Environmental Plan]
                                   │
         ┌─────────────────────────┼─────────────────────────┐
         ▼                         ▼                         ▼
 [Thermal Regulation]       [Safety Traction]         [Drying Protocols]
 Target warm water         Place a rubber mat or     Use warm towels immediately;
 (37.8°C to 39.2°C).        towel on the tub floor.   avoid noisy hair dryers.
Step-by-Step Bathing Protocol
-
Thermal Control: Cats have a higher baseline body temperature than humans. Water that feels comfortable to you can easily cause hypothermia or thermal shock to a small kitten. Always check that the water is lukewarm to warm, ideally matching their natural body temperature:
-
Securing Stable Traction: The primary reason kittens panic in a sink or bathtub is a slippery surface. Sliding around makes them feel unstable and trapped. Always place a non-slip rubber mat or a damp towel along the bottom of the tub to give them secure traction.
-
Gentle Water Application: Never spray water directly into a kitten's face or submerge their head, as this can trigger immediate panic. Use a small cup or a wet washcloth to gently wet their fur, working from the neck down toward the tail.
-
Shampoo and Thorough Rinsing: Use only a mild, tearless shampoo formulated specifically for cats. Rub it gently into their fur, being careful to avoid the eyes, nose, and sensitive ear canals. When you finish, rinse the coat thoroughly with clean, warm water. Any leftover soap residue can dry out the skin, cause irritation, or be swallowed when the kitten grooms themselves later.
-
The Post-Bath Drying Phase: Kittens lose body heat very quickly when wet. As soon as you turn off the water, wrap them immediately in a warm, dry towel and gently massage them to absorb the moisture. Avoid using loud electric hair dryers; the intense noise and heat close to their skin can terrify a young cat. Keep the kitten in a warm, draft-free room until their fur is completely dry.
Kitten Grooming and Desensitization Summary
| Grooming Task | Ideal Frequency | Primary Physical Benefit | Behavioral Objective |
| Coat Brushing |
Shorthair: 1x / week Longhair: Daily |
Removes loose undercoat fur; prevents painful matting and hairballs. | Builds tolerance for full-body handling. |
| Nail Trimming | Every 2 to 3 weeks | Prevents painful ingrown claws and accidental scratches. | Desensitizes the kitten to paw extension and digital pressure. |
| Bathing / Hydrotherapy | As needed for cleanliness | Safely removes dirt, grease, or skin irritants from the coat. | Eliminates fear of water through gentle, controlled exposure. |
FAQ
1. Why is grooming important for kittens beyond keeping them clean?
Grooming is not just a cosmetic routine for kittens. It plays a major role in behavioral development, preventive care, and long-term health. During the first weeks and months of life, kittens are in a sensitive learning phase where they form lasting associations with touch, handling, grooming tools, and new sensations. Regular grooming helps them become comfortable with being touched on the paws, belly, ears, and mouth, which makes future nail trims, bathing, brushing, and veterinary exams much easier. Physically, grooming removes loose fur, reduces swallowed hair, lowers the risk of hairballs, prevents matting, improves circulation, and gives owners a chance to detect skin issues, parasites, ear debris, or oral problems early.
2. At what age should a kitten start grooming training?
Grooming exposure should start as early as possible, ideally during the kitten socialization window between 2 and 7 weeks of age, though positive training remains very effective up to around 16 weeks. This is when kittens are most neurologically open to accepting new experiences as normal rather than threatening. Gentle handling, paw touching, short brushing sessions, and calm exposure to towels, combs, and warm water can help establish lifelong tolerance. If a kitten misses this stage, grooming may still be taught later, but it usually requires slower desensitization and more patience.
3. How often should I brush a kitten?
Brushing frequency depends mainly on coat type. Shorthaired kittens generally do well with brushing once a week, while longhaired or dense-coated kittens such as Persians, Maine Coons, and Ragdolls may need brushing every day. Daily grooming for longhaired kittens is especially important because tangles can form quickly in areas like the armpits, belly, groin, and behind the ears. Even if the coat looks fine, regular brushing removes dead fur, distributes natural skin oils, and helps kittens become comfortable with full-body handling.
4. What kind of brush should I use on a kitten?
For very young kittens, it is best to start with a soft-bristled brush, grooming glove, or silicone curry brush. These are gentle on delicate skin and less intimidating than metal combs or de-shedding tools. Once the kitten is relaxed with basic grooming, you can introduce more specialized tools depending on coat type. Longhaired kittens may eventually need a wide-tooth comb or detangling comb for undercoat maintenance, but the first goal is comfort and trust, not deep grooming.
5. What is the best way to introduce brushing to a kitten?
Begin when the kitten is calm, sleepy, or already in a cuddly mood. Start by petting them with your hand in favorite areas such as the cheeks, head, neck, and shoulders. Then slowly replace your hand with a soft brush and make a few short, gentle strokes. Keep the first sessions extremely brief—just 30 seconds to 2 minutes. Reward the kitten with praise, petting, or a small treat. Over time, expand the session to the back, flanks, chest, belly, and tail base. The goal is to create positive associations rather than complete a full grooming session immediately.
6. Which areas of a kitten’s body are easiest to brush first?
The easiest and lowest-stress zones are usually the top of the head, cheeks, neck, shoulders, and upper back. These are areas where many cats naturally enjoy being touched. Once the kitten is comfortable, you can gradually move to the sides of the body and eventually to more sensitive zones like the belly, chest, armpits, groin, and base of the tail. Sensitive areas should be brushed in short bursts, ideally while distracting the kitten with a lickable treat or calm reassurance.
7. Why are the belly, armpits, and groin considered difficult grooming zones?
These areas are sensitive because they are vulnerable body regions that cats instinctively protect. They are also common sites for tangles and mats, especially in longhaired kittens. Handling these zones too quickly can make a kitten squirm, scratch, or resist future grooming. That is why these areas should be approached gradually, with short sessions, gentle support, and positive reinforcement. If the kitten becomes tense, stop and continue another time rather than forcing the session.
8. Can grooming help me spot health problems early?
Yes. Grooming is one of the easiest ways to monitor a kitten’s health at home. While brushing or handling your kitten, you can check for fleas, flea dirt, ticks, scabs, skin redness, bald spots, ear wax buildup, bad odor from the ears, swollen gums, broken baby teeth, abnormal lumps, or pain reactions. Regular nail trims and paw handling also help you notice inflamed nail beds or injuries. Because kittens can hide illness well, grooming sessions are an excellent time to catch small problems before they become serious.
9. Why do kittens need nail trimming if they already scratch things?
Scratching helps kittens shed the outer layers of their claws and mark territory, but it does not always keep nails at a safe length. Indoor kittens can still develop very sharp claws that snag on blankets, carpets, or furniture. Overgrown nails may curve into the paw pad or cause accidental scratches during play. Regular trimming keeps the claws blunt enough to reduce injury while still allowing normal scratching behavior. It also helps kittens get used to paw handling, which is valuable for lifelong care.
10. How often should I trim a kitten’s nails?
Most kittens benefit from nail trimming every 2 to 3 weeks, though this varies depending on how quickly their claws grow and how active they are. Indoor kittens often need more frequent trims than outdoor cats because they do not wear down their claws on rough surfaces as much. If the nails start catching on fabric, feel unusually sharp, or visibly extend far past the toe, it is probably time for a trim.
11. How do I get a kitten comfortable with paw handling before trimming?
Start long before using clippers. During calm cuddle sessions, gently touch the kitten’s legs, hold each paw for a second or two, and lightly massage the toe pads. Occasionally press the paw pad so the claws extend, then reward the kitten with praise or a treat. This teaches them that paw handling is safe. Repeat this frequently in very short sessions. Once the kitten stays relaxed during paw touching, you can introduce the nail clippers nearby without trimming, then gradually move on to clipping one nail at a time.
12. What is the “quick” in a kitten’s nail, and why is it important?
The quick is the pink inner core inside the nail that contains blood vessels and nerve endings. It is the living part of the claw. If you cut into it, it will hurt and bleed, and the kitten may become afraid of future trims. In light-colored nails, the quick is often easy to see. In darker nails, you may need to trim very conservatively and remove only the sharp tip. Good lighting is essential.
13. How much of the nail should I cut?
Only trim the clear or translucent tip of the claw. Do not cut close to the pink quick. For kittens, it is better to trim a tiny amount safely than to try to shorten the nail aggressively. A small trim still reduces sharpness and helps with training. If you are unsure, clip less rather than more.
14. What should I do if I accidentally cut the quick?
If you accidentally nick the quick, stay calm. Apply styptic powder, styptic pencil, or plain cornstarch to the bleeding nail tip with gentle pressure for several seconds. Most minor nail bleeds stop quickly. Afterward, comfort the kitten and end the session if needed. Avoid turning the experience into a struggle. If bleeding does not stop or the kitten seems very distressed, contact a veterinarian.
15. Do I need to trim all of the kitten’s nails in one session?
No. In fact, it is often better not to. Many kittens do better with very short sessions. You can trim two or three nails, reward the kitten, and finish the rest later that day or on another day. The priority is maintaining a positive experience. Trying to force all the nails at once can create fear and resistance.
16. Do kittens really need baths?
Most healthy kittens do not need frequent full baths because cats are naturally efficient self-groomers. However, it is useful to introduce kittens to water gently while they are young so they do not panic if a bath becomes necessary later. Baths may be needed if the kitten gets into something sticky, oily, or unsafe, develops diarrhea that soils the coat, needs medicated bathing for a skin condition, or has flea dirt and grime that must be cleaned off.
17. When is the best time to introduce a kitten to water?
The best time is during kittenhood, when they are still learning what is normal in their environment. Early, calm exposure to shallow warm water, wet washcloths, and towel drying helps prevent fear later. The first experience should not be a full stressful bath. It can be as simple as standing the kitten on a non-slip surface and gently wiping the body with a warm damp cloth while offering reassurance.
18. What water temperature is safest for bathing a kitten?
The water should be lukewarm to warm, ideally around 37.8°C to 39.2°C (100.0°F to 102.5°F), which is close to a cat’s natural body temperature. Water that feels comfortable to human hands may still be too cool for a small kitten, especially when they are wet and lose heat quickly. Water that is too cold can cause stress and chilling, while water that is too hot can burn sensitive skin.
19. Why do kittens panic in a sink or bathtub?
One of the biggest reasons is lack of traction. Slippery surfaces make kittens feel unstable and trapped. This creates instant fear and can make them thrash or try to climb out. Placing a rubber mat or folded towel on the bottom of the sink or tub gives the kitten grip and makes the experience much less frightening. Sudden loud water noise and direct spraying at the face are also common triggers for panic.
20. What is the safest way to bathe a kitten?
Prepare everything in advance: towels, cat-safe shampoo, a cup for rinsing, and a non-slip mat. Use shallow warm water and keep the room draft-free. Wet the body gently from the neck down using a cup or washcloth rather than spraying the face. Apply a small amount of kitten-safe or cat-safe shampoo, avoiding the eyes, nose, mouth, and inside the ears. Rinse thoroughly so no residue remains. Immediately wrap the kitten in a warm towel and dry them well.
21. Should I wash a kitten’s face during a bath?
You should never spray water directly into a kitten’s face or submerge the head. If the face needs cleaning, use a soft damp cloth to wipe around the cheeks, chin, and forehead carefully. Avoid getting water into the nose, eyes, and ears. Face handling should always be gentle and controlled because it is one of the fastest ways to trigger panic.
22. Can I use human shampoo or baby shampoo on a kitten?
No. You should only use a shampoo formulated specifically for cats or kittens unless a veterinarian gives a different recommendation. Human shampoos, including many baby shampoos, can disrupt a cat’s skin barrier, dry out the skin, or cause irritation. Cats also groom themselves afterward, so any product left on the coat may be ingested.
23. Why is rinsing so important after shampooing a kitten?
Any shampoo residue left in the coat can cause itchiness, dry skin, flaking, or irritation. Because cats lick themselves thoroughly, leftover product may also be swallowed. Thorough rinsing is just as important as the washing step itself. If the coat feels slippery or soapy after rinsing, continue rinsing until the water runs clean and the fur feels free of product.
24. Can I use a hair dryer to dry my kitten?
It is usually better to avoid a loud hair dryer, especially for very young kittens or kittens who are not used to noise. Hair dryers can be frightening and may also become too hot if held too close. Instead, use warm dry towels and keep the kitten in a warm, draft-free room until fully dry. If a dryer must be used, it should be on a very low heat and low noise setting, introduced gradually, and never directed too close to the skin.
25. How long should a kitten grooming session last?
Very short sessions are best, especially at the beginning. For a new kitten, grooming may last only 1 to 3 minutes. The goal is not to finish everything at once, but to keep the kitten relaxed and cooperative. Over time, as the kitten learns that grooming is safe, sessions can become longer. Stop before the kitten becomes frustrated, overstimulated, or frightened.
26. What signs show that a kitten is becoming overwhelmed during grooming?
Common stress signs include tail flicking, flattened ears, tense muscles, skin twitching, trying to leave, vocalizing, swatting, sudden biting, or rapid breathing. Some kittens may also freeze and become very still, which can be another sign of fear rather than calmness. If you notice these signs, stop the session, let the kitten settle, and try again later with a shorter, easier approach.
27. How can I make grooming a positive experience?
Use positive reinforcement every time. Groom when the kitten is naturally calm, keep sessions short, speak softly, and reward the kitten with praise, play, or a favorite treat afterward. Introduce tools gradually rather than suddenly. Start with easy body areas, then slowly progress to more sensitive zones. Repetition, predictability, and gentle handling are more important than speed.
28. Can grooming help reduce hairballs in kittens?
Yes. Brushing removes loose fur before the kitten swallows it during self-grooming. This is especially helpful for longhaired kittens and heavy shedders. Less swallowed fur means a lower chance of hair accumulating in the stomach and forming hairballs. Consistent brushing is one of the most effective non-medical ways to reduce hairball risk.
29. Is daily grooming necessary for every kitten?
No. Daily grooming is usually necessary only for longhaired, thick-coated, or mat-prone kittens. Shorthaired kittens generally do well with weekly brushing, though some may benefit from extra grooming during shedding seasons. Nail handling and brief body checks can still be done more frequently, even if full brushing is not needed every day.
30. What should I do if my kitten hates grooming?
Go back to the easiest possible version of the task. If brushing is stressful, start by simply touching the brush to the kitten’s body for one second and rewarding them. If nail trimming is difficult, work only on paw handling first. If bathing is too much, use a warm damp cloth rather than a full bath. Never force the kitten through a long struggle, because that can create lasting fear. Progress through tiny steps, use high-value rewards, and consider asking a veterinarian or professional cat groomer for help if the kitten becomes highly reactive.
31. Is grooming also a form of training for future vet care?
Absolutely. Grooming teaches a kitten to tolerate restraint, touch, body inspections, paw handling, mouth checks, ear checks, and unfamiliar tools. Those same skills are essential during veterinary exams, medication administration, nail trims, temperature checks, and medical grooming later in life. A kitten that learns calm handling early often grows into an adult cat that is much easier to care for medically and emotionally.
32. What is the biggest mistake owners make when grooming kittens?
The most common mistake is moving too fast and prioritizing completion over comfort. Forcing a kitten through a long brushing session, trimming all claws at once, or giving a stressful bath without preparation can create fear that lasts for years. Grooming should be treated as a gradual training process. Success is measured by the kitten feeling safe, not by how much grooming gets done in a single day.