2 Ways to Create and Display Footer Widgets in WordPress
2 minggu ago · Updated 2 minggu ago

The footer of a WordPress website is one of its most frequently overlooked design elements, yet it carries significant functional and aesthetic weight. A well-designed footer communicates trust, provides essential navigation, offers social media connections, and often contains legal and contact information that users specifically seek out. From a development perspective, the challenge is building a footer that looks good, functions correctly — and crucially — can be updated by website administrators without requiring a developer to edit code each time content changes.
Static footers, built directly into a theme's template files as HTML, are straightforward to create but inflexible to maintain. If a client wants to update a phone number, add a new social media channel, or remove a link that's no longer relevant, they either need direct file access or must call a developer. In a world where website owners increasingly expect to manage their own content, this is an unacceptable constraint.
WordPress offers multiple solutions to this problem — mechanisms for making footer content dynamic, editable through the familiar WordPress admin interface, without requiring any knowledge of PHP or template file structure. This comprehensive guide explores two of the most practical approaches: the native WordPress widget/sidebar system, and the Advanced Custom Fields (ACF) plugin's field management approach.
The foundation for this tutorial is a four-column footer design — a common and versatile layout that appears across many professional website designs. The first three columns contain a heading and a list of links, while the fourth column includes a heading and social media icons with their associated links. We will take this design and make it fully dynamic using both methods, giving you the knowledge to choose the approach that best fits your specific project requirements.
The Footer Design We're Building
Our target footer consists of four equal-width columns arranged horizontally. The structure is:
- Column 1 — A heading (e.g., 'Services') and a vertical list of linked items
- Column 2 — A heading (e.g., 'Company') and a vertical list of linked items
- Column 3 — A heading (e.g., 'Support') and a vertical list of linked items
- Column 4 — A heading (e.g., 'Follow Us') and social media icons linking to the brand's social channels
Above the four columns, the footer includes a logo area and a tagline. The entire footer uses a dark background with light text — a classic design choice that visually separates the footer from the main content area.
We will convert this static design into a fully dynamic, editable footer within a custom WordPress theme called 'Playground.' All theme files are available in a GitHub repository for download, installation, and experimentation on any WordPress site.
Setting Up the Custom Theme
Before implementing either of the two methods for dynamic footer widgets, we need to establish our custom WordPress theme. This provides the structural foundation on which both methods will operate.
Theme Structure
Our custom theme — named 'Playground' — has a straightforward file structure appropriate for a demonstration theme. The key files include the standard WordPress theme files (style.css, index.php, functions.php, header.php, footer.php) along with method-specific template files for the footer content: main-footer-widgets.php for the native widget approach, and main-footer-acf.php for the ACF approach. A page-templates folder contains the Options Page template used in the ACF method.
After downloading the theme from the GitHub repository, you can install it on any WordPress site through Appearance > Themes > Add New > Upload Theme. Once activated, navigating to the root URL of your site should display the theme layout with an empty footer — the columns will be visible as containers but will contain no content until populated using one of the two methods described below.
Understanding WordPress Widgets
Before diving into the implementation code, it is worth taking a moment to understand what WordPress widgets are and how they fit into the broader theme architecture.
In the WordPress ecosystem, widgets are discrete pieces of information or functionality that can be added to specific sections of a website. These sections — called widget areas or sidebars — are defined by the theme and can be placed in any template file. Despite the name 'sidebar,' widget areas can appear anywhere in a theme: the actual sidebar, the header, the footer, or any other section the theme developer designates.
WordPress ships with a collection of predefined widgets out of the box, including a Recent Posts widget, a Categories widget, a Tag Cloud widget, a Navigation Menu widget, and others. Developers and plugin authors can also create custom widgets. Since WordPress 5.8, widgets are block-based — the same block editor used in the post and page editor is available for building widget content — though classic widgets remain available through a plugin or theme setting for sites that prefer the older interface.
Widget areas are registered in the theme's functions.php file using the register_sidebar() function. Once registered, they appear in the WordPress admin under Appearance > Widgets (or, in some themes, within the Customizer). Administrators can then drag widgets into those areas, configure them, and save the changes — all without touching any code.
Method 1: Native WordPress Widget Areas (Without a Plugin)
The first approach to creating dynamic footer content uses WordPress's built-in widget system — specifically the register_sidebar() function and its companion functions. This approach requires no additional plugins and uses WordPress core functionality that has been available for many years, ensuring broad compatibility and long-term stability.
Registering Widget Areas with register_sidebar()
The register_sidebar() function creates a new widget area in WordPress. You call it once for each area you want to create. In our four-column footer design, we need four widget areas, so we call register_sidebar() four times, each with a unique ID and display name.
This registration code belongs in the theme's functions.php file and should be hooked to the widgets_init action — a hook that fires after all default WordPress widgets have been registered, ensuring the order of operations is correct. Here is the complete registration code:
| function playground_sidebar_registration() {
$shared_args = array( 'before_title' => '<h5 class="widget-title">', 'after_title' => '</h5>', 'before_widget' => '<div id="%1$s" class="widget %2$s">', 'after_widget' => '</div>', );
register_sidebar( array_merge( $shared_args, array( 'name' => __( 'Footer 1', 'playground' ), 'id' => 'footer-1', 'description' => __( 'Add widgets here.', 'playground' ), ) ) );
register_sidebar( array_merge( $shared_args, array( 'name' => __( 'Footer 2', 'playground' ), 'id' => 'footer-2', ) ) );
register_sidebar( array_merge( $shared_args, array( 'name' => __( 'Footer 3', 'playground' ), 'id' => 'footer-3', ) ) );
register_sidebar( array_merge( $shared_args, array( 'name' => __( 'Footer 4', 'playground' ), 'id' => 'footer-4', ) ) ); } add_action( 'widgets_init', 'playground_sidebar_registration' ); |
Understanding the register_sidebar() Parameters
The $shared_args array defines HTML markup that wraps each widget and its title when displayed in the front end. These parameters are common to all four sidebars, so we define them once and merge them into each individual sidebar's configuration using array_merge(). The key parameters are:
| before_title | HTML inserted before each widget's title. Here we use an <h5> tag with a 'widget-title' class. |
| after_title | HTML inserted after each widget's title. Closes the <h5> tag. |
| before_widget | HTML inserted before each widget instance. Uses %1$s for the widget ID and %2$s for CSS class names. |
| after_widget | HTML inserted after each widget instance. Closes the wrapping div. |
| name | The human-readable name displayed in the WordPress Widgets admin screen. |
| id | A unique machine-readable identifier used in template code to reference this specific widget area. |
| description | An optional description displayed to administrators in the Widgets admin screen. |
| 💡 Note on Widget Titles
The before_title and after_title parameters only affect legacy/classic widgets. Block-based widgets (available since WordPress 5.8) manage their own heading markup through the Heading block, so these parameters have no effect on block-widget content. |
Populating the Widget Areas
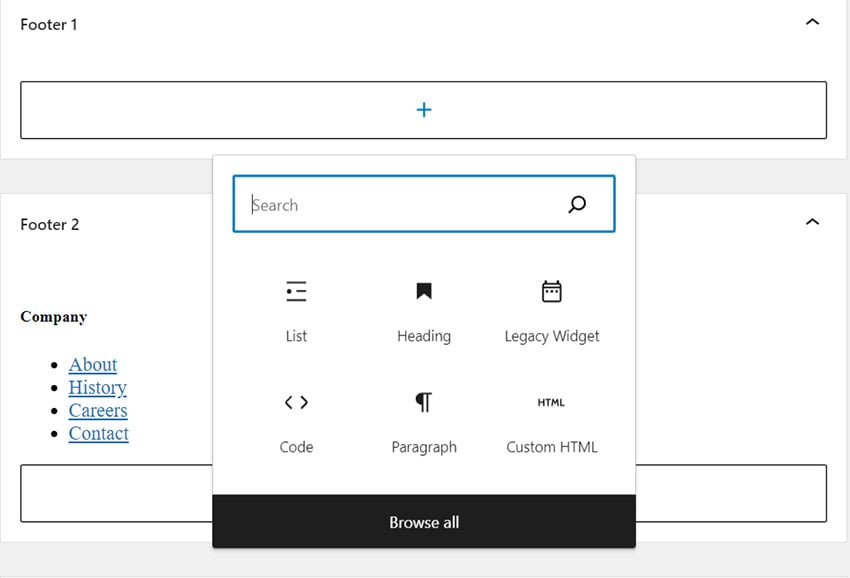
Once the widget areas are registered, they appear in the WordPress admin under Appearance > Widgets. From here, site administrators can add blocks to each widget area using the same block editor interface available in the post editor — making the process familiar to anyone who has created or edited a WordPress post or page.
For the first three footer columns (which contain a heading and list of links), we add two blocks to each widget area: a Heading block for the column title, and a List block for the navigation links. Each list item can contain a link, allowing administrators to update link text and URLs directly from the admin without touching any code.
For the fourth footer column (social media icons), we use a Custom HTML block — a widget block that allows administrators to insert arbitrary HTML directly. The HTML for the social icons includes SVG icon markup and anchor tags. While this requires the administrator to understand basic HTML, it provides maximum flexibility for the social media icons whose markup is not easily represented through standard block controls.
An alternative approach for the social icons — one that requires more development work upfront but is easier for non-technical administrators to manage — is to store the social links in a Theme Options page and generate the icon HTML using a WordPress shortcode. This approach would let administrators simply enter their social media URLs in a settings page without touching any HTML.
Displaying Widgets in the Front End
With the widget areas registered and populated, the next step is displaying their content in the theme's footer template. WordPress provides two functions for this: is_active_sidebar(), which checks whether a widget area has any widgets in it, and dynamic_sidebar(), which outputs the content of all widgets in a specified area.
The is_active_sidebar() check is important for maintaining a clean layout: if no widgets have been added to a particular footer column, that column's container div should not be rendered, preventing empty divs from affecting the footer's grid layout. Here is the complete template code for the footer file (main-footer-widgets.php):
| <footer class="site-footer">
<div class="container"> <div class="logo-wrapper"> <img src="logo.svg" alt="Site logo"> <div>...for creating memories!</div> </div>
<div class="widgets-wrapper"> <?php if ( is_active_sidebar( 'footer-1' ) ) : ?> <div class="widget"> <?php dynamic_sidebar( 'footer-1' ); ?> </div> <?php endif; ?>
<?php if ( is_active_sidebar( 'footer-2' ) ) : ?> <div class="widget"> <?php dynamic_sidebar( 'footer-2' ); ?> </div> <?php endif; ?>
<?php if ( is_active_sidebar( 'footer-3' ) ) : ?> <div class="widget"> <?php dynamic_sidebar( 'footer-3' ); ?> </div> <?php endif; ?>
<?php if ( is_active_sidebar( 'footer-4' ) ) : ?> <div class="widget"> <?php dynamic_sidebar( 'footer-4' ); ?> </div> <?php endif; ?> </div> </div> </footer> |
Optional: Disabling the Block Widget Editor
WordPress 5.8 introduced Gutenberg-based block widgets, replacing the classic widget interface. While block widgets offer a more powerful and consistent editing experience, some projects — particularly those maintaining older codebases or supporting clients who prefer the simpler classic interface — may benefit from disabling the block widget editor and restoring the classic Widgets screen.
Two approaches are available. The first is a code-based solution added to functions.php:
| function playground_setup() {
remove_theme_support( 'widgets-block-editor' ); } add_action( 'after_setup_theme', 'playground_setup' ); |
The second approach is installing the Classic Widgets plugin from the WordPress Plugin Repository, which restores the pre-5.8 widget interface without requiring any code changes. Once either approach is applied, the Widgets admin screen returns to showing the classic Text widget and other legacy widgets in a drag-and-drop interface, which some administrators find more intuitive than the block-based alternative.
| ⚠ Compatibility Note
While disabling the block widget editor works well for many projects, consider future compatibility before adopting this approach. The classic widget interface is maintained for backward compatibility but is not the long-term direction of WordPress development. For new projects, the block widget editor is the recommended approach. |
Method 2: Advanced Custom Fields (ACF) Approach
The second method for creating dynamic footer content uses the Advanced Custom Fields (ACF) plugin — one of the most widely used and highly regarded plugins in the WordPress ecosystem. While the native widget approach is simpler to set up and requires no additional plugins, the ACF approach provides complete control over the output markup and is particularly valuable for complex footer designs or when precise HTML structure is required for styling or JavaScript interaction.
Introduction to Advanced Custom Fields
Advanced Custom Fields is a plugin that allows developers to define custom fields and attach them to virtually any WordPress content type: posts, pages, custom post types, taxonomy terms, users, and more. The free version of ACF provides an extensive range of field types including text, image, WYSIWYG editor (rich text), URL, select, checkbox, and many others. The premium version (ACF PRO) adds additional features including an Options Page — a dedicated admin page for storing site-wide settings not tied to any specific post or page.
In this tutorial, we use the free version of ACF. Since the free version doesn't include a built-in Options Page, we create a custom page template that serves as our Options Page — a creative workaround that achieves similar functionality without requiring ACF PRO. For production sites where the full Options Page feature is needed, upgrading to ACF PRO is recommended.
Creating the Custom Options Page Template
The first step is creating a custom page template that will serve as our Theme Options / Footer Options page. Create a new file called options.php inside a page-templates folder within your theme directory. This file needs to contain the standard WordPress page template comment that identifies it as a page template:
| <?php
/** * Template Name: Options Page * Template Post Type: page * * @package Playground */
// This template will display the standard page content. // ACF fields attached to this page are used as site-wide options. get_header(); // Optionally display content here. get_footer(); |
Once this template file exists, you can create a new page in WordPress (Pages > Add New) and select 'Options Page' as its template in the Page Attributes panel on the right sidebar. This page will serve as the container for our footer field data. The actual page content — its title, body text, and permalink — doesn't matter; what matters is that the page exists so we can attach ACF fields to it and store values.
It is good practice to set this page to 'Private' or 'Password Protected' visibility to prevent it from appearing in search results or site navigation, and to remove it from any site menus.
Defining ACF Field Groups for the Footer
With the Options Page created, we can now define the ACF fields that will store the footer content. In the WordPress admin, navigate to Custom Fields > Field Groups > Add New. Create a new field group called 'Options Page Fields' and set its location rules to show only when the Page Template is equal to 'Options Page.' This ensures these fields appear only on our Options Page and not on other pages.
Within this field group, define the following fields:
WYSIWYG Fields for Footer Columns 1–3
- Footer 1 (field name: footer_1) — WYSIWYG editor field for the first column's heading and list content
- Footer 2 (field name: footer_2) — WYSIWYG editor field for the second column
- Footer 3 (field name: footer_3) — WYSIWYG editor field for the third column
- Footer 4 (field name: footer_4) — WYSIWYG editor field for the fourth column's heading and any text content
Group Field for Social Links
For the social media links, create a Group field (field name: socials) that contains four URL sub-fields:
- facebook — URL field for the Facebook page URL
- instagram — URL field for the Instagram profile URL
- linkedin — URL field for the LinkedIn profile URL
- youtube — URL field for the YouTube channel URL
Using a Group field for the socials organizes these related URLs together in the ACF admin interface and makes them easy to retrieve as a single array in PHP — a cleaner approach than defining four separate URL fields at the top level of the field group.
Retrieving the Options Page ID Dynamically
To display the ACF field values in the footer template, we need to tell ACF which post to retrieve the field values from. This requires the WordPress post ID of our Options Page. Rather than hardcoding this ID — which would break if the page were deleted and recreated — we query for it dynamically using WordPress's get_posts() function, searching for the page that uses our custom template:
| <?php
$options_page_id = get_posts( array( 'post_type' => 'page', 'posts_per_page' => 1, 'fields' => 'ids', 'meta_key' => '_wp_page_template', 'meta_value' => 'page-templates/options.php', ) )[0]; |
This query searches the database for pages using our options.php template, returns just the post ID (thanks to 'fields' => 'ids'), and takes the first result. The result is stored in $options_page_id for use in subsequent ACF function calls.
The dynamic approach is important for several reasons: it works correctly after a site migration where post IDs may differ from the development database; it accommodates multilingual sites where the Options Page may be translated into multiple languages with different IDs; and it correctly handles the replacement of the Options Page with a different page without requiring code changes.
Displaying Footer Content with ACF
With the field group defined and the Options Page ID retrieved, we can pull the field values using ACF's get_field() function and output them in the footer template. Here is the complete code for main-footer-acf.php:
| <?php
$footer1 = get_field( 'footer_1', $options_page_id ); $footer2 = get_field( 'footer_2', $options_page_id ); $footer3 = get_field( 'footer_3', $options_page_id ); $footer4 = get_field( 'footer_4', $options_page_id ); ?> <footer class="site-footer"> <div class="container"> <div class="logo-wrapper"> <img src="logo.svg" alt="Site logo"> <div>...for creating memories!</div> </div> <div class="widgets-wrapper"> <?php if ( $footer1 ) : ?> <div class="widget"> <?php echo wp_kses_post( $footer1 ); ?> </div> <?php endif; ?>
<?php if ( $footer2 ) : ?> <div class="widget"> <?php echo wp_kses_post( $footer2 ); ?> </div> <?php endif; ?>
<?php if ( $footer3 ) : ?> <div class="widget"> <?php echo wp_kses_post( $footer3 ); ?> </div> <?php endif; ?>
<div class="widget"> <?php if ( $footer4 ) : echo wp_kses_post( $footer4 ); endif; // Social links code goes here (see Section 4.6) ?> </div> </div> </div> </footer> |
Note the use of wp_kses_post() to output the WYSIWYG field values. This WordPress function sanitizes the HTML output, allowing standard post-content HTML tags (including headings, paragraphs, lists, links, and basic formatting) while stripping any potentially malicious JavaScript or other unsafe markup. It is the appropriate escaping function for outputting trusted rich text content from ACF WYSIWYG fields.
Displaying Social Media Links with Conditional Checks
For the social media icons in the fourth column, we retrieve the Group field and then check each individual URL before rendering the corresponding icon. This conditional approach ensures the footer renders correctly whether a site has all four social channels, some of them, or none at all.
| <?php
$socials = get_field( 'socials', $options_page_id ); $socials_fb = $socials['facebook']; $socials_in = $socials['instagram']; $socials_link = $socials['linkedin']; $socials_yt = $socials['youtube']; ?> <ul class="socials"> <?php if ( $socials_fb ) : ?> <li> <a href="<?php echo esc_url( $socials_fb ); ?>" aria-label="Find us on Facebook" target="_blank"> <!-- Facebook SVG icon here --> </a> </li> <?php endif; ?>
<?php if ( $socials_in ) : ?> <li> <a href="<?php echo esc_url( $socials_in ); ?>" aria-label="Find us on Instagram" target="_blank"> <!-- Instagram SVG icon here --> </a> </li> <?php endif; ?>
<!-- LinkedIn and YouTube follow same pattern --> </ul> |
The use of esc_url() for URL attributes is important: this function ensures that any URL retrieved from the database — even if it somehow contains invalid characters — is properly escaped before being output as an HTML attribute value. For user-supplied or admin-supplied URLs, always use esc_url() rather than outputting the raw value.
The aria-label attributes on each anchor tag are an accessibility feature: they provide a text description of the link for screen readers, which cannot interpret SVG icons visually. Since the icons themselves are marked aria-hidden="true" (removing them from the accessibility tree), the aria-label on the parent anchor is the only way screen reader users know where a link leads. This pattern — visually icon-only links with aria-label descriptions — is accessibility best practice for social media icon links.
Comparing the Two Approaches
Both methods achieve the same user-visible result — an editable, dynamic footer — but they do so through different mechanisms with different trade-offs. Understanding these trade-offs helps you choose the right approach for your specific project.
Feature Comparison
| Feature | Method 1: Native Widgets | Method 2: ACF |
| Plugin Required | No — uses WordPress core only | Yes — requires ACF plugin |
| Setup Complexity | Lower — simpler code | Higher — requires field group config |
| Admin Interface | Widgets screen with block editor | Custom Options page with ACF fields |
| Output Markup Control | Limited — WordPress adds wrapper divs | Complete — developer controls all HTML |
| WYSIWYG Editing | Yes — through Heading and List blocks | Yes — through WYSIWYG fields |
| Accessibility | Depends on blocks used | Developer's responsibility to implement |
| Performance | Slightly heavier (widget queries) | Lightweight (direct DB field queries) |
| Multilingual Support | Via polylang/WPML widgets | Via ACF multilingual add-ons |
| Best For | Standard sites, non-developer clients | Custom themes, precise markup needs |
Markup Control: The Key Differentiator
The most significant practical difference between the two methods is the degree of control over the output HTML. The native widget method generates HTML that includes WordPress's before_widget, after_widget, before_title, and after_title markup defined in the register_sidebar() call, plus the markup generated by each individual block. While you can customize this through the sidebar parameters, you cannot fully control how each block renders its HTML.
The ACF method, by contrast, gives the developer complete control. The PHP template code directly outputs whatever HTML structure is needed — with no extra wrappers, no generated IDs or classes that weren't explicitly added, and no deference to block rendering logic. For designs where precise CSS targeting is essential, or where the footer HTML must conform to a specific markup pattern for JavaScript interaction, this level of control is invaluable.
To see the difference concretely, open your browser's developer tools and inspect the footer elements after populating the footer using each method. You will see that the widget method adds wrapping divs with WordPress-generated IDs and class names, while the ACF method produces exactly the HTML structure you defined in your template — nothing more, nothing less.
Developer vs. Administrator Experience
For the developer setting up the theme, the ACF method requires more upfront work: creating the field group, configuring each field type, and writing the template code to retrieve and display each field. The widget method has a gentler setup — register_sidebar() is simpler than defining a field group, and dynamic_sidebar() is simpler than the individual get_field() calls required by ACF.
For the site administrator managing the footer content day-to-day, the experience is different. The widget screen provides a familiar block editor interface where content can be built visually using Heading and List blocks — the same blocks available in the post editor, making the experience immediately recognizable. The ACF Options page provides a cleaner, more structured interface where each footer column has its own labeled WYSIWYG field, and the social links have their own dedicated URL fields — potentially less intimidating than the block editor for administrators who find blocks confusing.
Advanced Considerations and Variations
Beyond the two core methods described above, there are several extensions and variations worth considering for more complex or production-grade implementations.
Using the WordPress Customizer for Footer Options
An alternative to both the widget system and the ACF Options Page is storing footer settings in the WordPress Customizer — the live preview interface accessible through Appearance > Customize. The Customizer API allows developers to add new panels, sections, and controls for storing theme-specific settings, with the advantage that administrators can see a live preview of their changes before saving.
For footer content, a Customizer-based approach would involve adding a new panel (e.g., 'Footer Settings') and within it, sections for each footer column, each containing controls for the column's heading text, link labels, and link URLs. For simple footers, this is an elegant solution. For complex footers with many links or rich text content, the Customizer's controls can become unwieldy.
Shortcodes for Social Links
One elegant alternative to embedding social icon HTML directly in the widget (Method 1) or the ACF template (Method 2) is to implement the social icons as a WordPress shortcode. A shortcode is a small piece of placeholder text that WordPress automatically replaces with generated HTML when rendering a page. By registering a [social_links] shortcode, administrators can insert the social icons into any text field or widget simply by typing [social_links] — without needing to know any HTML.
This approach is particularly useful when social links need to appear in multiple places on the site — not just in the footer, but also perhaps in a header navigation area, a sidebar, or a contact page. Rather than duplicating the social link URLs in multiple places, the shortcode draws from a single source of truth (perhaps a theme setting in the Customizer, or an ACF Options Page field), ensuring consistency across the site and making updates a one-step process.
Responsive Footer Layouts
The four-column footer layout used in this tutorial assumes sufficient screen width to display all four columns side by side. On mobile devices, a responsive design would typically stack these columns vertically — displaying them one above another rather than side by side. The CSS for this behavior typically uses a CSS Grid or Flexbox layout with a responsive breakpoint that switches from a four-column grid to a single-column layout on narrower screens.
Both methods described in this tutorial generate the same semantic HTML structure — four widget or field containers within a widgets-wrapper div — so the responsive CSS behavior is identical regardless of which method is used to populate the content. This is an important advantage of keeping the content and presentation layers properly separated: switching from one content management method to the other does not require any CSS changes.
Caching Considerations
For high-traffic websites, the database queries involved in retrieving ACF field values (Method 2) add load on every page request. While these queries are typically fast, sites with many concurrent visitors may benefit from implementing object caching to store the retrieved field values in memory between requests.
WordPress object caching can be enabled through plugins like Redis Object Cache or Memcached, which store the results of database queries in memory so that subsequent requests for the same data don't require a database round-trip. ACF field values are an ideal candidate for object caching because they change infrequently (only when an administrator updates the footer content) but are requested on every page load.
The native widget method (Method 1) also benefits from caching, as dynamic_sidebar() involves its own database queries to retrieve widget configuration and content. Most object caching solutions handle these queries automatically without requiring any code changes.
Security Best Practices for Footer Widget Output
Any time user-supplied or administrator-supplied content is output in a WordPress template, security must be considered. Both methods in this tutorial produce output that requires appropriate escaping to prevent potential security vulnerabilities.
Output Escaping Functions
WordPress provides a family of escaping functions for different contexts. The correct function depends on what type of content is being output and where:
| wp_kses_post() | For WYSIWYG/rich text content. Allows post-safe HTML (headings, paragraphs, lists, links) while stripping dangerous tags. |
| esc_url() | For URL attributes in HTML (href, src, action). Ensures the URL is properly formatted and removes potentially harmful protocols. |
| esc_html() | For plain text output in HTML context. Converts special characters to HTML entities, preventing XSS attacks. |
| esc_attr() | For HTML attribute values. Similar to esc_html() but appropriate for attribute context. |
| wp_kses_allowed_html() | Returns the array of HTML tags and attributes considered safe in post content. Can be customized for specific contexts. |
In the ACF footer template, we use wp_kses_post() for WYSIWYG field output and esc_url() for URL field output. This follows WordPress security best practices and should be replicated in any footer implementation that outputs administrator-supplied content.
Validating ACF Field Values
Beyond escaping at output time, it is good practice to validate ACF field values before using them in your templates. For URL fields specifically, PHP's filter_var() function with the FILTER_VALIDATE_URL flag can confirm that a stored value is a valid URL before using it in an anchor tag. For WYSIWYG fields, trusting ACF's own sanitization is generally appropriate, though wp_kses_post() provides an additional safety layer.
Putting It All Together: Choosing Your Approach
With both methods fully described and the trade-offs examined, the question of which approach to use comes down to the specific requirements of your project. Here is a practical framework for making that decision:
Use the Native Widget Approach When:
- You want to minimize plugin dependencies and keep the theme self-contained
- Your client or site administrator is comfortable with the WordPress block editor
- The footer content is straightforward — headings, text, and links — without complex HTML requirements
- You need the flexibility of the widget system's extensive plugin ecosystem
- You are building a theme for distribution and want to avoid requiring a specific plugin
Use the ACF Approach When:
- You need precise control over the output HTML for complex CSS or JavaScript requirements
- Your design includes structured data types (like separate fields for icon, label, and URL for each social link)
- You want a cleaner, more structured admin interface with labeled fields rather than a block editor canvas
- ACF is already part of your development toolkit and the plugin is already installed on the site
- You plan to use ACF's capabilities elsewhere in the theme for other custom field requirements
Conclusion
Creating dynamic footer widgets in WordPress is a fundamental skill for WordPress theme developers. The native widget approach and the ACF approach represent two well-established, production-tested solutions to the same problem — each with distinct strengths that make it appropriate for different project types and constraints.
The native widget approach, using register_sidebar() and dynamic_sidebar(), requires no additional plugins and leverages WordPress's built-in widget system. It is the right choice for standard sites where the default block-based widget editing experience is appropriate and where minimal plugin overhead is desired. The administrative interface is immediately familiar to anyone who has used the WordPress post editor.
The ACF approach trades some setup simplicity for significantly greater control over output markup. For themes where pixel-perfect HTML structure matters — whether for complex CSS layouts, JavaScript-driven interactions, or strict accessibility requirements — the ability to define exactly what HTML is generated is worth the additional configuration work.
Both approaches teach important WordPress development concepts: the hooks system (widgets_init, after_setup_theme), template organization (separating footer templates into includeable files), output escaping (wp_kses_post, esc_url), and the relationship between theme code and admin interface. Mastering both methods expands your toolkit and gives you the flexibility to choose the right approach for each client and project you encounter.
Download the Playground theme from its GitHub repository, install it on a test WordPress site, and experiment with both methods. The best way to solidify your understanding is to build both implementations, inspect their output in the browser developer tools, and develop your own sense of when each approach is the right tool for the job.
Quick Reference: Key Functions and Concepts
| register_sidebar() | Registers a new widget area. Call once per area in functions.php, hooked to widgets_init. |
| dynamic_sidebar() | Outputs all widgets in a specified widget area. Accepts the area's ID as parameter. |
| is_active_sidebar() | Returns true if a widget area has widgets in it. Use before dynamic_sidebar() to avoid empty divs. |
| widgets_init | The WordPress action hook that fires after default widgets are registered. Use for register_sidebar(). |
| get_field() | ACF function to retrieve a field value. Accepts field name and post ID as parameters. |
| wp_kses_post() | WordPress function to safely output HTML content. Allows safe post HTML, strips dangerous tags. |
| esc_url() | WordPress function to escape URL values for output in HTML attributes. |
| get_posts() | Used in ACF method to dynamically retrieve the Options Page ID by querying for its template. |
| after_setup_theme | WordPress hook for theme setup tasks including removing block widget editor support. |
| remove_theme_support() | Disables specific theme features. Use with 'widgets-block-editor' to restore classic widgets. |
FAQ – Dynamic WordPress Footer (Widgets & ACF)
1. What is a dynamic footer in WordPress?
A dynamic footer is a footer area that can be edited from the WordPress dashboard using widgets or custom fields, without modifying code.
2. Why should I use a dynamic footer instead of a static one?
A dynamic footer allows easier updates, better flexibility, and non-developers can manage content without touching theme files.
3. What are WordPress widgets in the footer?
Widgets are content blocks (like text, menus, or images) that you can place inside widget areas such as the footer using the WordPress admin panel.
4. What is Advanced Custom Fields (ACF)?
ACF is a popular WordPress plugin that allows you to add custom fields to your site, making it easier to manage structured content like footer text, links, or logos.
5. When should I use widgets vs ACF for the footer?
Use widgets for flexible layouts with multiple blocks, and use ACF when you need structured, controlled content like company info or copyright text.
6. How do I create a footer widget area in WordPress?
You can register a widget area using the register_sidebar() function in your theme’s functions.php file.
7. What is the function of dynamic_sidebar()?
dynamic_sidebar() is used to display the registered widget area in your theme, typically inside footer.php.
8. Can I make the footer fully customizable for clients?
Yes, by combining widgets and ACF, you can create a highly customizable footer that clients can manage easily from the dashboard.
9. Is a dynamic footer good for performance?
Yes, if implemented correctly. Using optimized code and limiting unnecessary widgets will maintain good performance.
10. How do I ensure security when displaying footer content?
Always use proper escaping functions like esc_html(), esc_url(), or wp_kses_post() to prevent security issues.
11. Are dynamic footers responsive?
Yes, responsiveness depends on your CSS. You can use Flexbox or Grid to ensure the footer adapts to all screen sizes.
12. Can I use Gutenberg blocks in footer widgets?
Yes, since WordPress 5.8, block-based widgets allow you to use Gutenberg blocks directly inside widget areas.
Tinggalkan Balasan